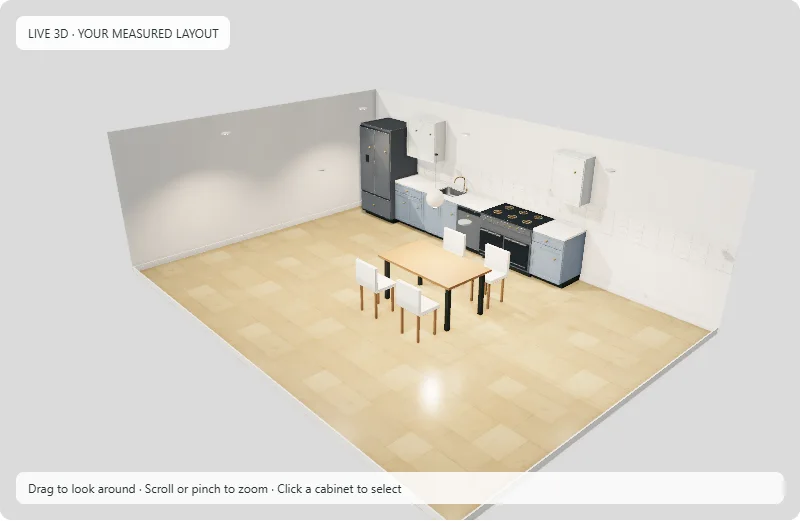
You don’t need to decide every cabinet finish before you start planning a kitchen. Begin with the room, put the fixed features in the right places, then try a layout you can measure and change. This tutorial walks through the free Handyman Hub Kitchen Designer & Planner, from an empty outline to a downloadable plan with three large 3D views.
The screenshots below come from the planner itself. They show an illustrative 25-by-18-foot kitchen and dining room, not a photographed installation. You can follow the same process with your own measurements. Generated layouts vary, so your first arrangement may look different.
Open the free kitchen planner →
1. Gather your measurements and name the design
Open the planner and choose Open the full-screen kitchen planner if you want more working space. Let the 3D view finish loading before you start exporting pictures. Give the design a useful name, such as “Kitchen — keep existing plumbing.” You’ll recognize it more easily when comparing several versions.
Before entering dimensions, make a rough sketch on paper. Record the overall walls and ceiling height, the positions and sizes of doors and windows, and the locations of fixed services. Include awkward features such as a radiator or boxed-in pipe in your notes, even where you cannot model them directly.
Measure the sections between corners and openings as well as the overall wall. Those smaller measurements should add up to the overall length. Closeout Kitchens’ measuring guide explains this cross-check and the importance of recording obstructions. For a printable starting sheet, KraftMaid’s room-measurement guide is another useful reference. Follow your eventual supplier’s measuring requirements before placing an order.
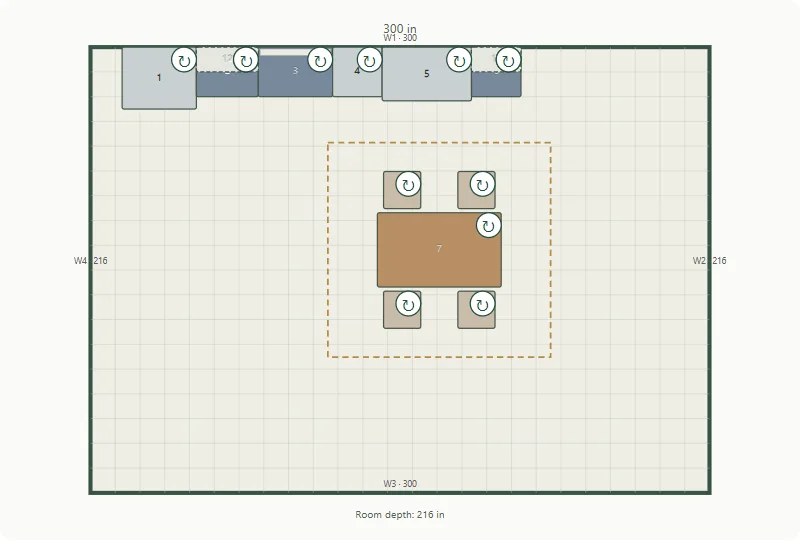
In Your room, select inches or millimeters. Our example is 25 × 18 feet, so the entries are 300 inches wide and 216 inches deep. An 8-foot ceiling is 96 inches. Enter all three values, then select Update room. The room’s outline should now match those overall dimensions.
Don’t enter 25 in a field set to inches and expect a 25-foot room. If the result looks unexpectedly tiny or large, check the unit selector first.
2. Build the outline before filling it with cabinets
Choose a rectangle, L-shaped room or U-shaped room for a quick starting point. For a less regular kitchen, switch to the 2D plan and use Edit room shape. Move the corner points to create the rough outline. Add a corner along a wall when a recess or projecting section needs another change of direction.
Once the outline looks right, enter the exact length for a selected wall section in the room-shape controls. Preview the adjustment before confirming it. Work around the room, checking the wall labels against your sketch rather than estimating positions by eye.
A closed room cannot accept every possible combination of lengths. For example, a rectangular room cannot keep one long wall at 300 inches and its opposite parallel wall at 312 inches while all four corners stay square. If a measurement conflicts with confirmed lengths, review the sketch and release or correct the relevant constraint. Don’t force an impossible outline just to clear a warning.
Using an uploaded sketch
Under the room controls, choose Have a sketch or floor plan? and upload a PNG, JPEG or WebP image. Open Scale and align your uploaded sketch, select two points with a known distance, enter that distance and apply the scale. Adjust the image alignment and visibility so you can trace the room over it.
This is a reference image, not automatic room recognition. A top-down sketch works best. A perspective photograph can help you remember the space, but it does not provide a reliable measured floor plan. Reference images are not included in the editable project backup, so keep the original image separately.
3. Put doors and windows in before the cabinet run
Use + Door or + Window, or drag an opening onto a wall in the 2D view. Select it to adjust its dimensions and position. For a window, check its sill height as well as its width. A window in the correct position but at the wrong height can make the 3D view misleading.
Compare the distance from a corner to the opening with your measured sketch. Include the space needed around trim when checking the real installation; the tool’s opening is an adjustable planning representation.
For an open-plan kitchen and dining room, keep the full room boundary. Use an open edge, low boundary wall or open passage where it represents your proposal. These controls illustrate a layout; they do not assess whether a wall can be removed.
4. Place appliances, then build the cabinet runs
Start with the sink, refrigerator and range. Their real-world positions depend on your appliance sizes and service locations, so settle those before filling every gap with cabinets. Add the dishwasher and check how its opening would interact with the surrounding space.
For a quick example, choose Classic shaker, Kitchen & dining and Generate an example room in the kitchen generator. The result remains editable. For your own project, choose Use my room and openings so a generated example doesn’t replace the room you measured. Treat any suggested layout as a starting point to review.
The US cabinet sizes & cabinet runs section offers base, drawer, wall and tall cabinets, plus fillers and end panels. Select a width, add the cabinet, then use Add beside selected to continue a run. If there isn’t enough room, try the other placement side or choose a smaller unit.
Select a component from the item list or drawing. Enter its width, depth and position, then press Apply measurements. Height has its own control. You can also choose a wall and use Snap selected unit to wall. The presets and generated items are generic: replace their dimensions with the specifications of the products you intend to buy.
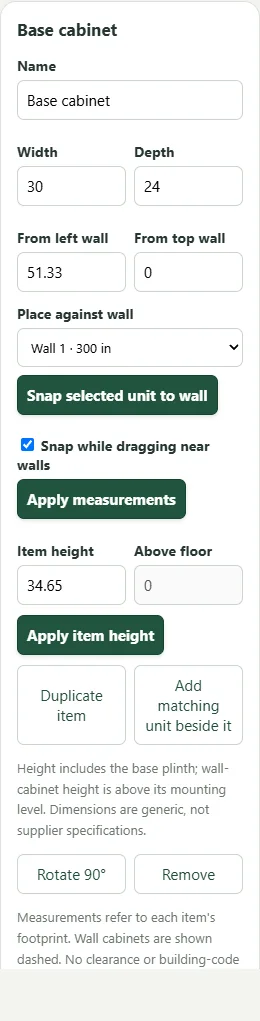
As a simple run check, three 30-inch cabinets total 90 inches. Adding a 24-inch appliance space gives 114 inches. Along a 120-inch wall, that leaves 6 inches before allowing for the actual end treatment and installation clearances. The remaining space is a planning question, not an automatic instruction to buy a 6-inch filler.
Use the circular rotation control on a selected item, or its Rotate 90° button. Undo lets you step back after an unwanted move or deletion. Save a restore point before trying a substantially different arrangement.
5. Compare colors and finishes in 3D
Switch to 3D kitchen to see the arrangement. Start with the overview, then try the front or eye-level view. Drag to look around and use the zoom controls to inspect a detail. The view is a live illustration of your layout, so you can keep making changes without waiting for a long photo-rendering process.
Choose cabinet fronts, handle shapes and hardware finishes. The color panel lets you target base and tall cabinets, wall cabinets or the island. Enter a HEX code and press Apply colour to compare a specific palette. Wall paint can be applied throughout the room or to an individual wall.
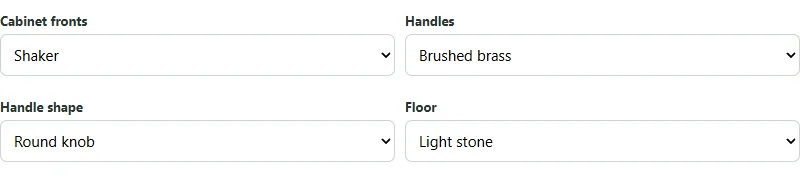
Try countertops and flooring alongside the cabinet color. Then open the room-finish and lighting controls for sink styles, faucets, backsplash and fixture options. Belfast-style sinks and wider range-cooker presets are available, but confirm the real product and its supporting cabinet dimensions separately.
Screen colors, material textures and lighting are illustrative. Order physical samples before committing to a finish. A layout that looks appealing in daylight may also be worth reviewing with the warm-evening setting, but the planner is not a lighting calculation.
6. Review the empty space as carefully as the cabinets
Open Review your design and address room-fit, component-clash and blocked-opening messages. Use the gap measurement to compare two objects. The result is a shortest edge-to-edge distance, not a guarantee that a person can walk comfortably through the room.
The appliance-opening and walking-space controls let you test distances you choose. Set them using the actual appliance instructions and the requirements for your project. These are simplified space checks, not a simulation of every hinge, drawer or appliance door.
In a kitchen and dining layout, rotate the chairs correctly and inspect the pull-out space behind them. Check how somebody would approach the refrigerator while other people are seated. A “no issues found” message only describes the checks the tool performs; it does not approve ventilation, structural work, plumbing or electrical installation.
7. Save the editable project and download the PDF
The planner saves designs in this browser on this device. That is convenient while experimenting, but it isn’t your only backup. Choose Download editable project and keep the JSON file somewhere you can find it. Use Open project to load that file again. Keep the file unchanged if you want to reopen it reliably.
Choose A4 or US Letter in the PDF controls. Leave Include three large 3D kitchen views checked to add the overview, opposite-side and front views, each on its own landscape page. The measured plan, component schedule, elevations, finishes and review information stay in the report too.
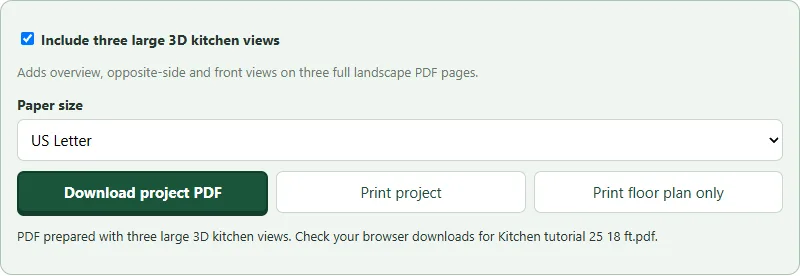
Press Download project PDF and wait for the prepared message. Check your browser’s downloads list, including any permission or save-location prompt. If 3D has not loaded on your device, wait for it to finish or untick the 3D option and download the drawings without those pictures.
Print project prepares the full brief; Print floor plan only prepares the plan. A PDF is useful for discussing the design, but the editable project is the file you need for further changes. Keep both.
What to do with your finished layout
Save a version before making major alternatives. You might keep one design with the sink in its existing position and duplicate it to test a different cabinet run. Give each version a descriptive name, then compare the measurements and practical compromises as well as the pictures.
Once the layout is settled, use the flooring calculator for floor-pack quantities and your entered costs, or the tile, grout and adhesive calculator for a tiled floor or backsplash. These are separate estimating tools; the kitchen designer does not produce a complete renovation price.
Take the plan, appliance specifications, room measurements and finish samples to your supplier or installer. Their checks turn an early layout into an orderable design. Open the kitchen planner when you’re ready to start your first version.