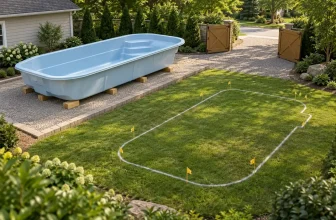
An above-ground pool can fit on a product page and still be wrong for your backyard. The pool diameter is only one measurement. Frame legs, delivery access, equipment and the space required by your local rules all need a place on the plan.
Before buying a kit, confirm the model’s complete installation footprint, check the site and access, and price the work outside the box. This checklist helps you gather those details for a freestanding frame or rigid-wall pool. It covers planning before installation; the selected pool’s manual remains the starting point for assembly and base preparation.
Keep the free above-ground pool installation planner open as you work. You can record dimensions, supplier specifications and missing quotes without pretending that every cost is already known.
1. Start with the exact pool model
Save the product number, current installation manual and a drawing that shows the outside supports. A description such as “18-foot round pool” isn’t enough to order ground preparation. Establish whether that measurement describes the water vessel, the outside wall or the widest part of the assembled kit.
Frame pools and rigid-wall kits also have different construction details. Swimming Pool Steve’s overview of above-ground pool types is useful background when comparing systems. Once you shortlist a model, use its own documentation for the dimensions and support requirements.
Ask the supplier for a written list of what the kit includes: liner, frame or walls, filter, pump, hoses, fittings, groundsheet, ladder and cover. “Complete kit” is a shopping description, not an itemized installation scope. Missing delivery, preparation or electrical work can change the decision.
2. Measure three separate spaces
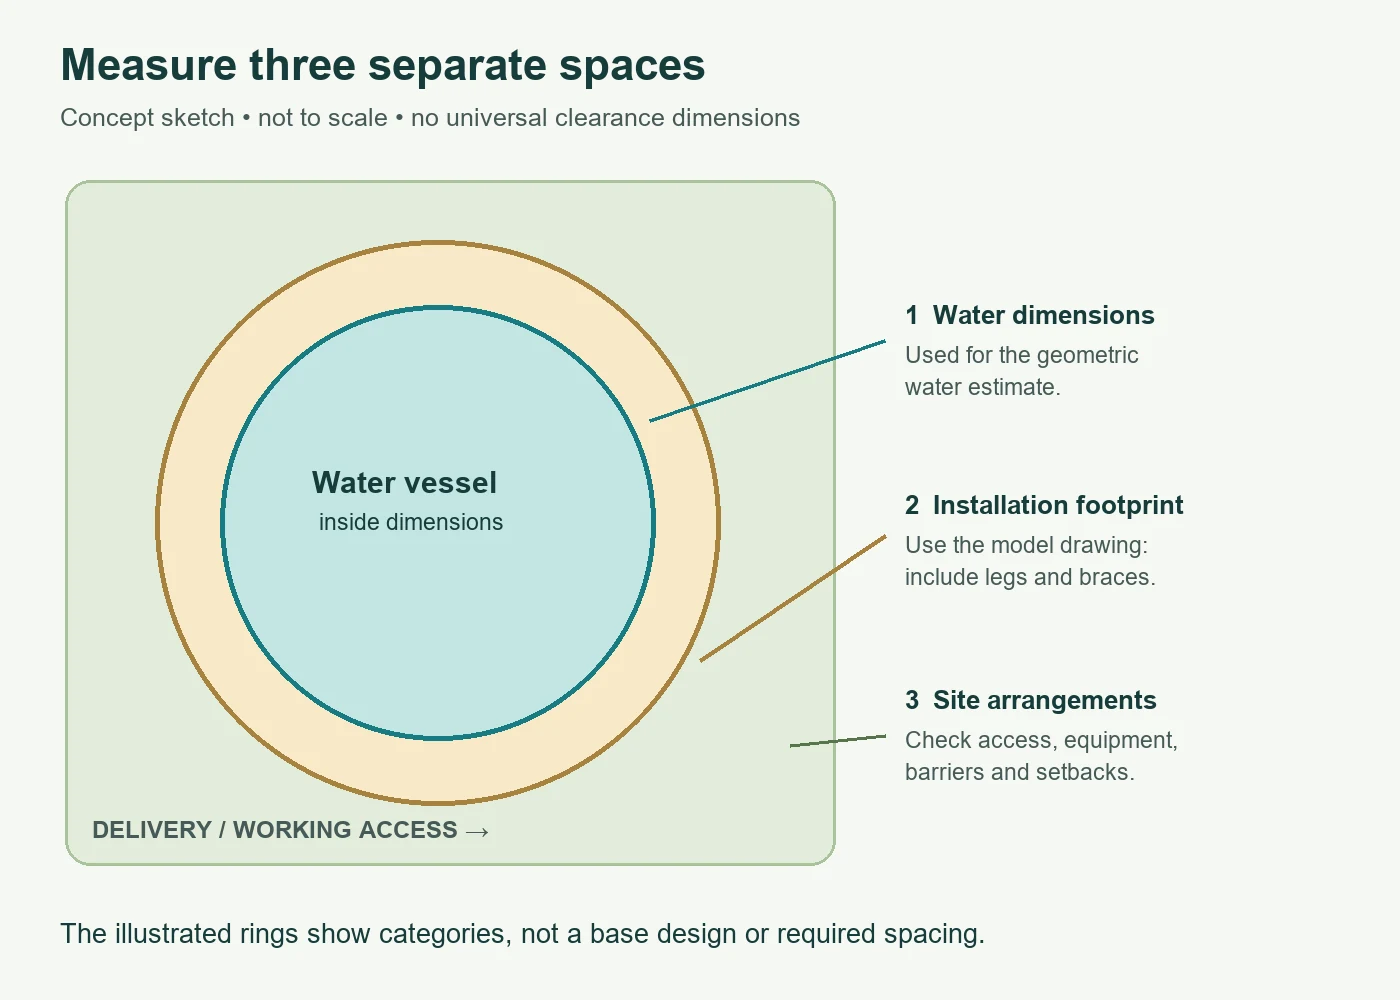
The water vessel
Record the inside length and width, or diameter for a circle. Also record the depth to the rim and the manufacturer’s intended water level. These measurements help estimate water volume. They do not establish the size of the prepared base.
The complete installation footprint
Find the widest assembled dimensions, including projecting legs and braces. Check any additional preparation area specified in the manual. Don’t transfer the internal swimming area into a materials order and assume the supports will fit.
The rest of the site
Draw the equipment position, entry point, delivery route and proposed barrier arrangement. Add the property boundaries and nearby structures. Get the applicable setbacks and access requirements confirmed for your location and model; a gap that looks convenient isn’t evidence that it meets them.
A simple sketch is enough to expose a problem early. If a brace lands in the side path or the equipment blocks the gate, resolve it before the kit arrives.
3. Check the ground before ordering a base
Walk the proposed site and note slopes, wet patches, roots, recent fill and obstructions. Photograph the area and have the installer assess anything uncertain. A lawn that looks flat from the patio can still need substantial preparation.
Bestway’s ground-preparation guidance begins with reading the pool manual. It also distinguishes an optional sand buffer from leveling the ground. That distinction matters: don’t treat a layer of sand as a universal solution to a sloping site.
Ask for the preparation method and quantities for your selected pool in writing. Record the specified material, area, depth and support details, together with who is responsible for checking the finished preparation. If the supplier hasn’t specified a material, leave its quantity unresolved instead of choosing a convenient default.
If digging is proposed, follow 811’s before-you-dig process: contact your state service, wait the required time and confirm all utility responses before starting. Keep the ticket and instructions with the project notes.
Once excavation dimensions have been supplied, the excavation and spoil calculator can help organize removal quantities. The excavation quantity guide explains why the hole volume and the spoil-removal volume differ. Neither the guide nor the calculator decides excavation depth or ground suitability.
4. Check access, approvals and services together
Measure the narrowest point on the delivery route, including gate openings and tight turns. Ask how the kit arrives and whether preparation equipment can reach the site. A supplier’s delivery fee may cover the curb, not carrying materials into the backyard.
Before placing the pool, ask your local building department what applies to the proposed installation. Include the pool dimensions, location, intended access and any electrical work in the inquiry. Also check any applicable HOA or property restrictions. Keep written answers rather than relying on a neighbor’s different installation.
Plan barriers and entry arrangements as part of the initial budget. The CPSC’s home-pool barrier guidance is a useful US reference; confirm the requirements enforced locally. Barriers do not replace active supervision.
Have a qualified electrical contractor review the equipment and location. Get the required electrical work, inspections and exclusions included in their quote. Also establish how the pool will be filled and what arrangements apply to drainage or discharge. These questions are easier to settle while positions can still move.
5. Build a budget beyond the kit price
Use the following list when requesting quotes. For each item, record “included,” a separate price, or “awaiting quote.” An empty price is an unanswered question, not a saving.
- Pool kit and delivery: exact model, included equipment, unloading and carrying.
- Site preparation: assessment, groundworks, specified base or supports, spoil removal and access protection.
- Assembly: labor, equipment setup and responsibility for checking the installation.
- Services: electrical work, filling arrangements and any required drainage work.
- Access and barriers: the complete specified arrangement, including gates where required.
- Approvals and completion: applicable fees, inspections, commissioning and site reinstatement.
- Ongoing ownership: water, electricity, treatment supplies and maintenance, kept separate from installation.
Check overlaps before adding the numbers. If the kit includes a filter and pump, don’t buy them again in a separate equipment allowance. If a groundworks package includes preparation materials, don’t add those materials to a second purchasing list.
Illustrative budget only: suppose your recorded prices are $1,200 for a kit, $650 for preparation and $150 for delivery. The known subtotal is $2,000. A chosen 10% contingency adds $200 to those known prices, giving $2,200 before other adjustments. That figure still excludes every unquoted item. These are invented arithmetic inputs, not market prices or a suggested complete pool budget.
Keep quote dates, tax treatment and exclusions beside the prices. A contingency helps with uncertainty in priced work; it cannot replace an electrical, barrier or installation quote that has never been obtained.
6. Put the measurements into the planner
In the above-ground pool planner, select Imperial — inches and USD. Enter inches in the dimension fields: 18 feet is 216 inches. Changing currency only changes the currency display; it does not convert existing prices.
Some supplied quantities and results remain labeled in metric, including installation area in square meters and water volume in cubic meters. Follow the label on each field. Don’t put a square-foot figure into a square-meter field.
A checked geometry example: a hypothetical circular vessel with an internal diameter of 216 inches, a 48-inch depth to the rim and 6 inches of freeboard has 42 inches of water depth. The live planner returned 25.22 m³, approximately 6,663 US gallons. This assumes a simple, straight-sided cylinder; it is not a manufacturer’s fill instruction or a capacity claim for a named pool.
For an actual kit, use the supplier’s capacity when appropriate. The optional supplied capacity replaces the geometric volume rather than adding to it. Neither figure tells you the required base area.
Next, enter the model reference, supplied installation footprint and confirmed preparation details. Work through each installation package. Use a package quote where it includes the complete scope, and separate scheduled rows only for work you need to price independently.
Calculate, then read the unresolved-items list before relying on the total. With no prices entered, the planner can show $0.00 of known prices alongside missing packages; that is not a free installation. Save the project and download a backup when you have a version worth keeping.
Before you order: a final checklist
- I have the exact model, manual and complete installation dimensions.
- The site and delivery route have been measured.
- Preparation and support requirements have been confirmed for this pool.
- Applicable approvals, barriers and electrical work have been checked.
- Quotes identify inclusions, exclusions, taxes and who does each job.
- My total clearly separates known prices from outstanding work.
If one of these is missing, use it as the next question for the supplier or installer. Getting that answer now is usually more useful than refining an estimate built on a guess.
Common planning questions
Can I use the advertised pool size as the base size?
Only if the model documentation explicitly identifies it that way. The water vessel and the outer support footprint can differ. Use the installation drawing for site preparation.
Can I put the pool on a deck or partly bury it?
This checklist and the above-ground planner cover freestanding installations. A deck-supported or buried arrangement needs explicit suitability and a separate design assessment. Don’t assume an ordinary above-ground kit permits either change.
What if I’m still choosing between above-ground and in-ground?
Compare complete installation scopes. The prefabricated in-ground pool planner covers a delivered shell, while the constructed in-ground pool planner covers a pool built on site. Prepare a separate scenario in the appropriate tool for each system.
Comparing other pool options?
If you are deciding between pool types, the prefabricated inground pool planning guide covers shell delivery and installation scope. The constructed inground pool budget guide helps separate quoted work from costs that still need checking.