

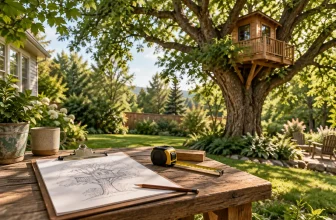
A freestanding raised playhouse needs more planning space than the little room shown in a photograph. The platform, stairs or ladder, supports, activity areas and protective surfacing all need to fit the site. Start with the complete layout and the intended users before you turn the room dimensions into a shopping list.
The freestanding raised playhouse planner organizes platforms, enclosures, supplied design references and work packages. It can help you avoid double-counting floor area and kit contents. It cannot select safe post sizes, footing dimensions or occupancy from the measurements you enter.
Separate a kit project from a custom build
For a kit, start with the exact model and current manual. Record the complete installed dimensions, intended age range, included components and site requirements. A product’s room size may omit a slide, stair, roof projection or required use area.
For a custom build, obtain a coordinated design for the platform, foundations, posts, bracing, connections, access and barriers. A sketch of four posts supporting a floor is not that design. Adding a roof, changing the height or enlarging the platform can change more than the material quantity.
A structure supported entirely from the ground belongs in this planner. If a tree carries part of it, use the tree-supported treehouse planning guide and the matching planner instead. Do not label a hybrid arrangement freestanding just because it also has posts.
Map the whole site, including the route in
Draw the proposed structure on a simple site sketch. Add fences, nearby buildings, trees, slopes, drains and the route from delivery to the installation area. Record where boxes and long pieces can be stored without blocking access.
Backyard Discovery’s assembly preparation guidance distinguishes delivery from assembly and asks customers to prepare the ground and a clear access route. Its requirements apply to its products and service; use your chosen model’s manual and agreed installation scope for the actual project.
Establish who handles ground preparation, locating buried services, anchoring and reinstatement. Before excavation, follow 811’s state-specific before-you-dig process and discuss any private services requiring separate locating. Marking a footprint with string does not establish where it is safe to dig.
Count a room inside its platform only once
Suppose a hypothetical platform is 10 feet by 8 feet, with a 6-by-5-foot enclosure sitting within it. The whole platform is 80 square feet. The enclosure occupies 30 square feet of that area, leaving 50 square feet outside the enclosure.
The floor total is 80 square feet, not 110. You may need different finishes inside and outside, but that does not create another structural floor. Keep the location of the room, wall supports and access in the supplied design; this example only explains area accounting.
In Imperial mode, enter a platform of 120 by 96 inches. Open the room section, enable the rectangular enclosure and enter 72 by 60 inches. The live planner showed 7.43 m² of platform and 2.79 m² of enclosure within it. These are rounded metric summaries of 80 and 30 square feet. Dimension inputs use inches, while several supplied area and guarding fields remain metric.

The platform perimeter is 36 feet, but it is not automatically the guarding purchase quantity. Openings, walls, stairs, landings and the approved barrier arrangement affect that schedule. Enter the supplied guarding run in its labeled units rather than copying the gross perimeter without checking.
Keep the roof and wall quantities on their own lines
An enclosed room adds walls and potentially a roof. Openings reduce some wall finish areas, but they can also require headers, trims, flashings and other components. Subtracting a window’s area does not produce its framing specification.
For the floor example above, the roof was deliberately marked as supplied separately. The result kept that missing specification visible. Do not use a default roof rise, overhang or wall height as a recommendation. Replace illustrative settings with the chosen kit or design information before using the material schedule.
If you use the sheet cutting planner for a separately specified lining, include actual sheet sizes, saw kerf and permitted orientation. A collection of pieces that fits by area may still fail to fit the available sheets.
Include the safety work in the budget
A finished floor and roof do not complete a children’s play installation. Budget for appropriate access, guarding, protective surfacing and inspection, using the selected equipment and qualified design advice where needed.
The CPSC Outdoor Home Playground Safety Handbook covers fall protection, entrapment, surfacing and maintenance. It specifically distinguishes protective surfacing from grass and dirt. The applicable surfacing and use area depend on the equipment and its fall height; do not choose a universal depth or clearance from an unrelated photo.
Check how adults will supervise the space and reach a child who needs help. Keep moving activities away from conflicting routes. These decisions belong on the plan before you place the supports, not as decorations to add once the budget is spent.
Read the kit inclusion list against your work packages
Put design and permissions, groundworks, structure, platform, enclosure, openings, access, barriers, coatings, delivery and maintenance into named packages. Mark each as quoted, scheduled, unresolved or not applicable with a reason.
If an installation quote includes both the platform boards and their labor, do not also add those boards as a separate new purchase. If the kit excludes a coating or anchoring work, keep that exclusion visible until it is priced. The planner’s known-cost total is provisional when any required work remains unresolved.
For a separately specified deck surface, compare the decking board layout example before ordering. Its stock-length lesson can help with a platform, while the playhouse design still governs structural and safety details.
Prepare a handover file as well as a shopping list
Keep the manual, drawing revisions, material specifications, installer details and inspection instructions together. Recalculate after every scope change before printing or exporting. A downloaded project backup preserves the editable scenario; a printed result records the version you sent out.
Ask who checks the completed installation and what routine maintenance is required. Future additions should be reviewed against the original design and intended use. A clear handover makes it easier to keep the playhouse usable long after the last board is fitted.


[…] Raised Playhouse Planning […]