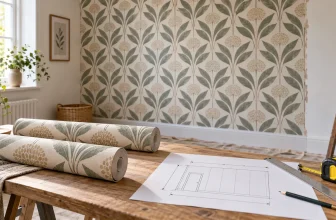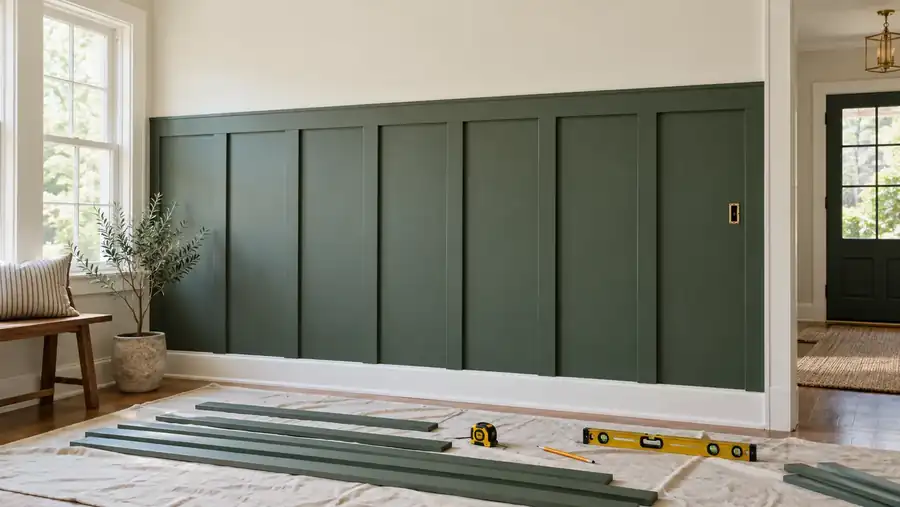
Good wall paneling starts with a measured elevation, not a packet of battens. Decide the finished height, the face width of every rail and stile, the number of clear bays and how the layout will deal with sockets, corners, doors and an uneven floor. Only then should you convert the drawing into cut lengths and stock boards.
This guide explains how to use the free Wall Paneling and Wainscoting Calculator, reproduces a 4.5 m worked example and shows where decorative arithmetic stops and site judgment begins.
The direct answer
For a 4.5 m wide by 1.2 m high grid with 100 mm members, four equal columns and one row, the clear openings are 1.0 m wide by 1.0 m high. The simple grid contains 14 m of batten: two 4.5 m horizontal rails and five 1.0 m clear vertical pieces. With 5 m stock, zero kerf and no waste allowance, the calculator requires three stock lengths.
Choose the paneling system before measuring quantities
“Wall paneling” can mean applied board-and-batten strips, picture-frame moulding, raised panels, tongue-and-groove boards, sheet panels or a framed wainscot. They do not share one material formula. The calculator models a regular decorative grid made from rails and stiles. It is useful for comparing equal bays and converting a settled grid into linear material. It does not design structural framing, specify fixings or prove that the wall is suitable.
Write down what will actually be installed. Applied strips fixed over a sound wall use different pieces from a system with sheet backing and a cap moulding. A baseboard that remains in place may form the lower visual boundary without being part of the calculated grid. A top cap, shelf, return, corner trim and end scribe are separate from the basic rails and stiles unless you deliberately include them.
Woodgrain’s practical wainscoting walkthrough emphasizes measuring wall width and height, allowing for outlets and marking the spacing before cutting. Its example also shows why the chosen moulding profile changes the layout. Use any supplier’s article as inspiration, then follow the installation and finishing instructions for the exact products you buy.
Measure a wall elevation that reflects the real room
- Measure width at several heights. Record the shortest usable width if the sides are not parallel, then decide where a scribed or adjusted end gap can be hidden.
- Measure height at several positions. Floors and ceilings wander. Establish a level reference line rather than copying the floor with every rail.
- Mark fixed obstacles. Record doors, windows, radiators, switches, outlets, thermostats and access panels from a consistent corner and datum.
- Confirm existing trim. Note baseboard thickness, door casing projection and whether a top cap needs to return into an adjacent wall.
- Separate each wall. A four-wall room is rarely four identical grids. Calculate and label every elevation instead of multiplying one wall by four.
Measure to the surfaces that will exist when the work is installed. New backing panels, repaired plaster or retained baseboard can change the finished plane. A tape measurement taken around furniture is not the same as a clear wall measurement. Sketch the wall and write dimensions on the sketch; this makes an accidental duplicated or omitted section easier to spot.
Understand rails, stiles and clear bays
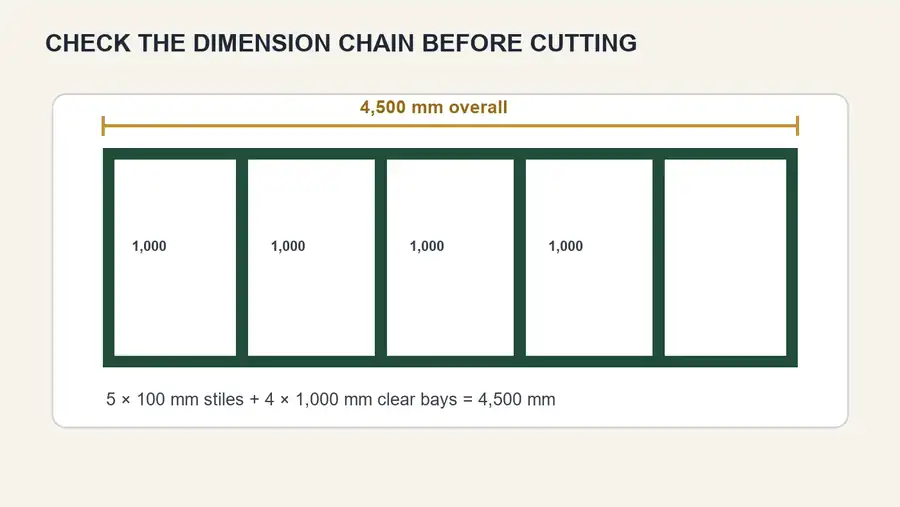
Rails run horizontally. Stiles run vertically. A bay is the clear space between member faces. If a wall has four bays, it normally needs five bounding stiles when both outside edges use a stile. The clear-bay width is therefore not simply wall width divided by four.
For a regular grid, subtract the total face width occupied by the stiles, then divide the remaining width by the number of bays. With a 4,500 mm wall, four bays and five 100 mm stiles, the available clear width is 4,500 − 500 = 4,000 mm. Divide by four to get 1,000 mm clear bays.
Use the same reasoning vertically. One clear row between a 100 mm bottom rail and a 100 mm top rail leaves 1,000 mm on a 1,200 mm-high paneling zone. If you add a middle rail, you have two clear rows and three horizontal members; subtract all three member faces before dividing the remainder.
| Dimension | Worked input | Check |
|---|---|---|
| Overall wall width | 4,500 mm | Measured finished span |
| Paneling height | 1,200 mm | From finished floor/reference |
| Member face width | 100 mm | Actual visible face |
| Columns | 4 | Five vertical boundaries |
| Rows | 1 | Two horizontal boundaries |
| Clear bay | 1,000 × 1,000 mm | Dimension chain totals correctly |
How to use the wall-paneling calculator
- Select metric or imperial units to match the measurements and stock information you have recorded.
- Enter the wall width and the height of the paneling zone. Do not enter full room height when the design ends at chair-rail height.
- Enter the visible face width of the rails and stiles. Use the installed face, not the nominal board description.
- Choose the number of columns and rows. Compare alternatives before deciding; a mathematically equal layout may still look awkward around a window or outlet.
- Enter stock length and cutting kerf if the tool offers those fields. Stock optimization needs the length you can actually buy.
- Add a considered waste allowance for defects, test cuts, mitres, scribes and damage. Do not hide an unresolved layout inside an oversized percentage.
- Enter prices only in the unit the supplier actually charges. A per-board price is different from a per-foot price.
- Save or print the result with the elevation sketch, product profile and date.
Run each different wall separately. Label the saved results “north wall,” “window wall” and so on. That gives the installer a traceable cut list and prevents one long rail from being counted twice.
Worked example checked in the live calculator
Enter a 4.5 m wall, 1.2 m paneling height, 100 mm member face, four columns and one row. Set stock length to 5 m, kerf to zero and waste to zero for the pure geometry check. The tool returns 1 m clear bay width, 1 m clear bay height, 14 m total batten and three 5 m stock lengths.
The 14 m consists of 9 m of horizontal rail plus 5 m of vertical material. In this model, each of five stiles fits between the rails, so each is 1 m long. If your real assembly runs stiles behind, over or through the rails, the cut lengths change. Model the joint arrangement you will actually build rather than forcing every style into one formula.
Three 5 m boards provide 15 m before kerf. That one-metre arithmetic surplus is not automatically a usable one-metre offcut. The cut pattern matters: two 4.5 m rails consume most of two boards, while the five 1 m verticals fit the third only if zero kerf is assumed. With a real saw kerf, five exact 1 m pieces do not come from a 5 m board. The practical purchase may therefore rise, or the cut plan may need shorter stiles, longer stock or suitable offcuts.
Lay the design out full size before ordering
Transfer a level top line and the stile centerlines to the wall with low-tack tape or pencil marks. Step back from normal viewing positions. Check the paneling against furniture, wall lights and door casing. A calculator can make four equal bays; it cannot decide whether three bays align better with a bed, table or fireplace.
For a symmetrical feature wall, decide what is visually central. It may be the wall itself, a bed, a window or a fireplace. Those centerlines are not always the same. For several connected walls, decide whether bays continue around corners or each wall reads as its own elevation.
Use a sample of the actual member width. A 100 mm strip looks very different from a pencil line. Include the top cap and base detail in the mock-up because their projection and shadow affect the proportions.
Plan around outlets, switches and other interruptions
An outlet in the path of a stile is a design decision, not an invitation to notch material casually around electrical equipment. Compare a different bay count, alter the starting offset or have the electrical arrangement assessed by a qualified person where relocation is proposed. Do not cover junctions, vents, access points or required labels.
At doorways and windows, choose whether the paneling terminates against casing, incorporates the casing as a visual boundary or returns into a reveal. Measure the visible gap after the finished trims are known. Very narrow slivers beside casing often look accidental and can be difficult to finish cleanly.
Turn linear metres into a real stock order
Total linear length is only the first number. Create a cut list grouped by finished length and profile. Then allocate those cuts to the supplier’s stock lengths with saw kerf between pieces. Keep long, uninterrupted rails visible in the cut plan; a total-length calculation might imply they can be assembled from short leftovers even when the design calls for one-piece rails.
Check straightness, moisture suitability, finish quality and whether the nominal size matches the actual face. MDF, softwood and hardwood have different handling and finishing requirements. Use the Timber and Lumber Calculator for a broader stock-length exercise, and the Equal Spacing Calculator when you need spacing without a full rail-and-stile grid.
Allow for preparation and finishing
Paneling highlights the wall behind it. Loose surfaces, pronounced texture, dampness and badly uneven backgrounds need investigation and preparation before decorative strips are fixed. Marking a perfect grid over a defective wall does not solve the defect.
Decide whether pieces are primed before installation, how cut edges will be sealed and which joints are intended to be filled. Paint quantity should cover the finished wall, member faces and exposed edges for the chosen coats and product coverage. The paint quantity guide and painting calculator help with that separate estimate.
Fixings and safety need a site-specific plan
The calculator does not choose adhesive, nail length or fixing positions. Wall construction, member material, load, services and manufacturer instructions govern those choices. Locate concealed electrical, plumbing and other services before drilling or nailing. Decorative members should never be treated as grab rails, guards or structural supports unless an appropriate design says they are.
Cutting MDF and timber creates dust; use the controls and protective equipment appropriate to the product and task. Secure workpieces and follow the tool manufacturer’s instructions. Older painted surfaces may need additional precautions before sanding or disturbance.
Common mistakes and quick checks
- Dividing wall width by bay count: subtract stile faces first.
- Confusing centers with clear gaps: write both dimensions on the drawing.
- Counting four stiles for four bays: a bounded four-bay grid normally has five.
- Using nominal board size: measure the actual installed face.
- Ignoring kerf: several cuts can make an apparently exact stock plan fail.
- Multiplying one wall around the room: calculate each real elevation.
- Buying before a taped mock-up: view the proportions full size first.
- Assuming level and square: establish a datum and plan the adjustment.
Frequently asked questions
How many stiles do I need for four wall-panel bays?
A simple bounded grid normally needs five vertical stiles: one at each outer edge and three between the four clear bays. Different termination details can change that count.
Should panel bays be exactly equal?
Equal bays are a useful starting point, but doors, windows, furniture and focal points may justify a deliberate adjusted layout. Make any variation obvious and planned.
What width should battens be?
There is no universal width. Choose the actual profile and mock it up on the wall. Enter its visible installed face in the calculator.
Can I calculate an entire room at once?
It is safer to calculate and label each elevation separately, then combine the stock order after checking which offcuts transfer between walls.
Does the calculator include a top cap or shelf?
Only if the tool has a specific option or you add that length separately. The basic grid result covers the rails and stiles described by its fields.
How much waste should I add?
Base it on the cut plan, defects, mitres, scribes and your experience. A percentage is not a substitute for checking whether long rails fit available stock.
Can I run a stile across an electrical outlet?
Do not improvise around electrical equipment. Rework the layout or have any proposed electrical change assessed and completed appropriately.
Should I follow the floor if it slopes?
Usually the visual grid needs a level datum, with adjustment planned at a less noticeable boundary. Check the real room and intended detail before cutting.
Does wall paneling add structural strength?
This decorative calculator makes no structural claim. Do not rely on decorative paneling as bracing, guarding or support.
When should I order material?
Order after the full-size layout, product dimensions, cut list, stock optimization and fixing/finish plan have all been checked.