

Before cutting the first tile, compare a tile centered on the room’s centerline with a grout joint centered there. Both layouts can look balanced, yet one may leave generous edge pieces while the other produces narrow strips. Then check the doorway, the most visible wall and the second direction of the grid.
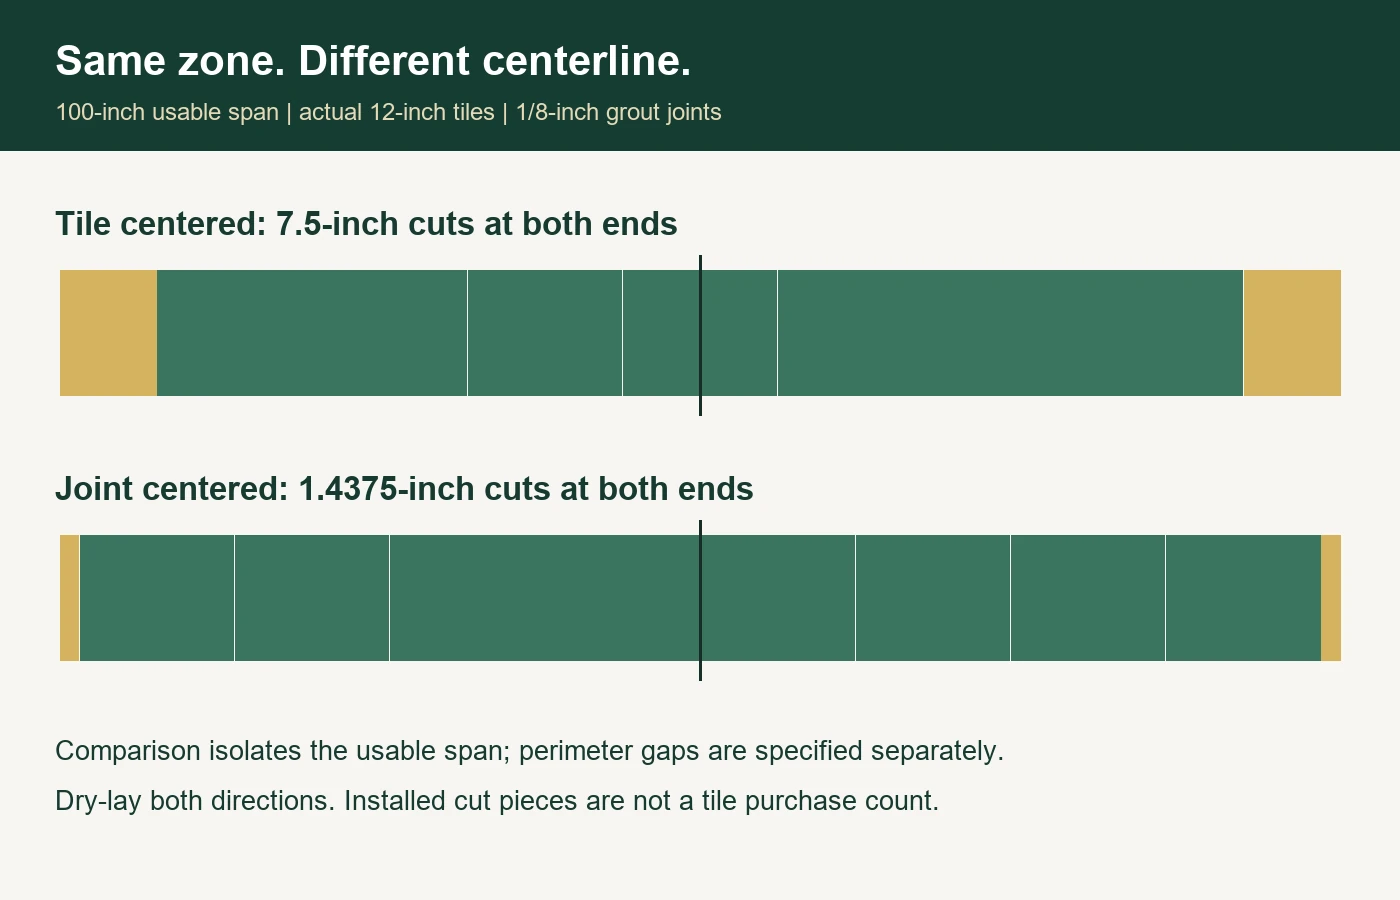
Our example uses a 100-inch by 60-inch usable rectangle, actual 12-inch square tiles and ⅛-inch joints. Centering a tile along the 100-inch span leaves 7½-inch edge cuts. Centering a joint leaves only 1⁷⁄₁₆-inch cuts. The floor area hasn’t changed; the position of the repeating pattern has.
The free tile layout and setting-out calculator compares these options. It models a straight grid in one rectangular zone. It doesn’t design a staggered pattern, solve an L-shaped room or tell you how many unopened boxes to buy.
Measure the boundaries you actually intend to tile
Sketch the room and name your reference edges. Record whether a measurement is between finished walls, unfinished surfaces or another boundary. Measure at more than one point. A room that is wider near the door will not become rectangular because one width was entered into a calculator.
Check the relationship between the main reference line, doorway, tub or shower edge, cabinets and adjacent flooring. DIYTileGuy’s bathroom floor layout walkthrough illustrates why establishing and checking reference lines matters. Use that practical check to judge the mathematical comparison, rather than assuming the geometric center must be the best visual starting point.
Recesses, pipe openings and other obstacles need a separate review. If you break a room into rectangles for quantity estimating, that doesn’t mean each rectangle should receive an independently centered grid. A continuous tiled floor needs a coordinated layout across the adjoining areas.
Use actual tile size, not just the box name
A nominal product name is not a measurement of your delivered tile. Measure the actual pieces and use the product’s specified joint requirements. The repeating pitch is the actual tile dimension plus the grout joint. A small difference can accumulate across several columns and change the final cut.
For the worked example, the pitch is 12 + 0.125 = 12.125 inches. We use a ⅛-inch joint to demonstrate the arithmetic, not to prescribe a joint width for every product. Daltile’s floor tile layout instructions recommend a loose layout with uniform joint spacing and adjusting centerlines when edge cuts are small. The actual installation still needs the instructions for your tile and setting system.
Perimeter and movement-joint details are separate from grout joints within the grid. The calculator has an optional perimeter strip, but its width is an input you supply, not a specification it selects.
Compare the two centerlines with a checked example
Select Imperial — inches. Enter a 100-inch length, 60-inch width, 12-inch tile length, 12-inch tile width and 0.125-inch grout width. Leave rotation, grid shifts and perimeter-strip options off for this isolated usable-zone comparison. In a real room, establish the usable boundaries after accounting for the specified perimeter details; zero here is not an instruction to tile tight against walls.
Choose tile-center alignment in both directions and calculate. The live tool returns 45 installed pieces: 21 whole tiles in the grid and 24 cut pieces. The left and right pieces are 7.5 inches wide; the top and bottom pieces are 11.75 inches deep.
| X alignment | Y alignment | Smallest X piece | Smallest Y piece | Installed pieces |
|---|---|---|---|---|
| Tile center | Tile center | 7.5 in | 11.75 in | 45 |
| Tile center | Joint center | 7.5 in | 5.6875 in | 54 |
| Joint center | Tile center | 1.4375 in | 11.75 in | 50 |
| Joint center | Joint center | 1.4375 in | 5.6875 in | 60 |
The table uses independently calculated exact values. The tool rounds its displayed dimensions to three decimal places, so the last digits can differ slightly in the onscreen report. Keep the original measurements when marking out rather than repeatedly adding rounded figures.
You can check the 100-inch span without software. The tile-centered row contains seven full 12-inch widths and eight ⅛-inch joints. That leaves 100 − 84 − 1 = 15 inches, shared between two 7.5-inch edge pieces. The joint-centered row has eight full widths and nine joints: 100 − 96 − 1.125 = 2.875 inches, or 1.4375 inches at each end.
Choose the layout against the room, not just the table
The tile-centered combination is an obvious candidate in this rectangular example because its smallest pieces are larger in both directions. A real room may introduce another priority: a visible threshold, a long exposed wall, a centered feature or an adjoining tiled area.
Dry-lay a row in both directions, using actual spacers. Check the far edge as carefully as the starting edge. Mark the chosen reference on your sketch and note which side of a line the tile belongs to. A good calculation can still be installed inconsistently if the reference changes halfway across the room.
Full-tile edge-start mode is useful when investigating a dominant edge. It transfers the remaining cut to the opposite side, which may be acceptable behind a cabinet or conspicuous at a doorway. The optional shift lets you explore other positions. Neither setting removes the need to inspect all boundaries.
Keep layout pieces separate from purchase quantities
The example’s 24 cut pieces do not automatically require 24 additional full tiles. Some cuts may share a tile; other cuts may consume a whole tile because of orientation, cutting loss, breakage or the required factory edge. A diagram of installed rectangles isn’t an optimized cutting schedule.
Once the layout is settled, use the tile, grout and adhesive estimator to plan purchases with an allowance that fits the actual cuts, pack size and desired spares. Keep the box calculation separate from the layout report. Don’t reduce the order merely because two pieces appear to fit within a nominal tile outline.
For a wet-area project, the waterproofing materials calculator can organize quantities for a specified system. Layout doesn’t establish substrate suitability, waterproofing, drainage slope or movement-joint design.
A final check before the saw comes out
Confirm the tile batch, actual dimensions, joint width, perimeter detail and reference line. Check the door transition and any exposed cuts. Compare the printout with the dry layout and resolve any mismatch before cutting a stack of identical pieces.
If the walls taper, the pattern is staggered or obstacles dominate the room, use the rectangular result as one reference rather than a complete cutting plan. Write down the exceptions on the printout so the clean diagram doesn’t hide the untidy parts of the real room.
Compare your tile layout and print the positions →
Featured artwork is a concept illustration. The diagram is a checked geometric comparison, not an installation specification.


[…] Tile Layout & Edge Cuts […]