

A shed materials list becomes useful when it tells you more than a total number of boards. You need to know which part of the shed each item belongs to, what size the pieces are, how much cutting waste has been allowed, and which details still depend on the products you choose.
Start with our free 3D shed planner and materials PDF. You can compare five roof shapes, adjust a rectangular shed, choose finishes and download a list for that design. This guide shows how to read the results and turn them into a sensible supplier quote, using an 8 x 10 ft example and an 8 x 12 ft comparison.
The important distinction: the PDF is a materials buying aid with calculated straight timber blanks and clearly labeled allowances. It is not a complete set of construction drawings or a final structural cutting schedule. Settle the framing specification before buying structural lumber or cutting pieces.
Start with the space around the shed
Mark the proposed footprint on the ground before choosing a size. Then stand where the doors will be. Can you wheel a mower in, turn with a long board, and open both door leaves without hitting a fence or planter? An extra two feet of shed length is little help if the entrance is awkward every time you use it.
Write down the outside floor width and length, the available height, the access route for deliveries and the room needed around the walls. The planner’s dimensions describe the rectangular shell; roof overhangs extend beyond it. Its window locations are presets, and the door sits on the front wall. You cannot drag openings to arbitrary positions or draw an L-shaped footprint in this version.
Also make a separate note for the base, ground preparation and drainage. They are not solved by the floor-deck quantity. Check your proposed location and structure with the relevant local building or planning office; the tool does not determine permits, setbacks, snow loads or foundation design for your address.
If this space will become an insulated office rather than general storage, use our backyard office budget checklist to include the extra services, insulation and interior work.
How to use the free shed planner
- Name the design and choose units. Enter a useful Project name, such as “Back garden shed – option A.” Choose Feet & inches or Metric before entering dimensions. In imperial mode the number fields use decimal feet: 8 ft 6 in is 8.5, not 8.6. Metric shell dimensions are entered in meters.
- Enter Length, Width and Lowest wall height. For the first example, use 10 ft, 8 ft and 8 ft respectively. The planner supports widths of 6-20 ft and lengths of 6-24 ft, with wall heights of 6-12 ft. Stay within those ranges; a bigger building needs a different design, not an extrapolated materials order.
- Choose Roof style and Roof pitch. Start with Gable and 4:12. Compare the front and side views before deciding. The flat option uses a slight drainage fall and a membrane finish; it is not a perfectly horizontal roof. Hip and Dutch hip roofs change the surfaces, edges and framing allowances.
- Set the openings and spacing. Choose Double doors, One window and 16 in / 406.4 mm Stud spacing for the example. The spacing is an estimating assumption, not a structural recommendation. Use the spacing from your confirmed design for an actual project.
- Choose materials, waste and appearance. Select Timber boards, Asphalt shingles and 10% Waste allowance. Wall, roof and trim colors change the preview. Finish level changes the budget allowance; it does not automatically replace the visible cladding with a different product.
- Review the model and results. Choices update automatically, and Apply choices & refresh view gives you an explicit refresh. Try the 3D camera presets, Open doors, Lift off roof and Floor plan. Check the design title and the materials table after each size change.
- Download both useful files. Click Download free materials PDF for the buying document, then Save project file to keep an editable copy. The PDF records the choices at download time. After editing, generate a new PDF and give it a clear filename so the supplier gets the right version.
On a smaller screen, work through the controls first and scroll to the preview and estimate. If rotating the model feels slow, choose Battery saver under Detail. The dimensions and materials results remain the things to check before downloading.
Worked example: an 8 x 10 ft gable shed
Here are the inputs used in the current planner, followed by the quantities to look for. An 8 x 10 ft footprint is approximately 2.44 x 3.05 m. These are example inputs, not a recommended structural design.
| Field | Choice |
|---|---|
| Width / Length / Lowest wall height | 8 ft / 10 ft / 8 ft |
| Roof style / pitch | Gable / 4:12 |
| Stud spacing | 16 in / 406.4 mm |
| Door / Windows | Double doors / One |
| Cladding / Roof covering | Timber boards / Asphalt shingles |
| Waste allowance / Finish level | 10% / Standard |
Floor deck: why the result is three reference sheets
The net floor area is 8 x 10 = 80 sq ft. Adding 10% gives 88 sq ft. A reference 4 x 8 ft sheet covers 32 sq ft, so 88 / 32 = 2.75, rounded up to 3 sheets equivalent.
That calculation checks area, not a supported panel layout. You still need to plan panel orientation, joints and offcuts against the framing. A sheet with the wrong thickness or exposure rating does not become suitable because the area is right. Use our guide to sheet cuts, kerf and usable offcuts when translating the area into actual pieces.
Wall covering: openings and gables both matter
The four rectangular walls give 2 x (8 + 10) x 8 = 288 sq ft. The two gable triangles add about 10.67 sq ft. The example model then subtracts a 6 x 7 ft door opening and one 3 x 3 ft window: 288 + 10.67 – 42 – 9 = 247.67 sq ft net wall covering.
With 10% waste, that is about 272.43 sq ft, or 9 reference sheets equivalent. Because we selected timber boards, nine is not a shopping instruction to buy nine boards or nine sheets of siding. Ask for the chosen profile’s effective coverage, then convert the area into its real board or pack quantities. The model openings also need checking against the actual door and window rough-opening sizes.
Roof covering: use the sloped surface, not the floor area
The planner includes approximately 7.09 in (180 mm) of overhang on each edge in this model. At 4:12 pitch, the gable roof surface works out at 108.21 sq ft. You can independently check it as (8 + 2 x 0.59055) x (10 + 2 x 0.59055) x sqrt(1 + (4 / 12)2).
Add 10% once to get 119.03 sq ft of roof-finish allowance. Dividing that by 32 and rounding up gives 4 roof-deck sheets equivalent. Shingle bundles, underlayment rolls, starter strips and ridge caps still need their own product coverage and edge lengths. They are not all covered by that one square-foot number.
What changes if the shed becomes 8 x 12 ft?
Keep every other choice the same and change only Length to 12 ft. This adds 16 sq ft of floor space, a 20% increase. The roof and walls change by different percentages because openings, width and overhang remain the same.
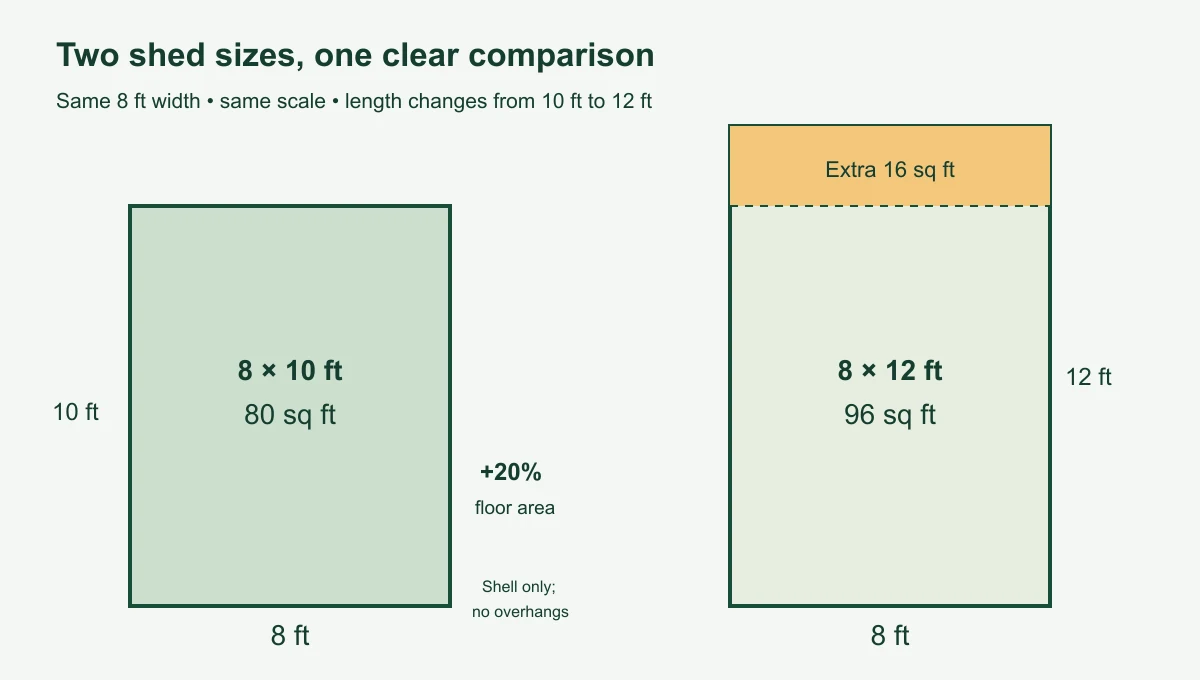
| Result | 8 x 10 ft | 8 x 12 ft |
|---|---|---|
| Net floor area | 80 sq ft | 96 sq ft |
| Floor deck, reference sheets | 3 | 4 |
| Net wall covering | 247.67 sq ft | 279.67 sq ft |
| Wall covering, reference sheets | 9 | 10 |
| Roof surface, including overhangs | 108.21 sq ft | 127.56 sq ft |
| Roof finish, including waste | 119.03 sq ft | 140.32 sq ft |
| Roof deck, reference sheets | 4 | 5 |
For example B, the floor check is 96 x 1.10 / 32 = 3.3, rounded up to four sheets. The roof check is 127.56 x 1.10 / 32 ~ 4.38, rounded up to five. Real stock comes in whole pieces and packs, so a modest size change can add a whole sheet. Compare the two layouts before deciding that the longer shed is only “a little more lumber.”
Try both shed sizes in the planner, download each list and request like-for-like quotes. Keep the roof, openings, waste and finish level unchanged while comparing size; otherwise you will be comparing several decisions at once.
Read the cutting list before buying stock lengths
The PDF separates calculated straight blanks from framing allowances. For the 8 x 10 ft example, the floor calculation assumes actual member thickness of 11/2 in, with cross-members fitting between the two side rims. Under that assumption, the cross-member blank is 8 ft – 3 in = 7 ft 9 in.
You will see two 10 ft side-rim blanks and nine 7 ft 9 in cross-member blanks in that example. The estimate’s 13-piece floor allowance includes rounding and waste; it does not mean the drawing contains 13 identical joists. Check each row’s quantity and length rather than using the total as a cutting instruction.
The wall-plate blanks use a separate 31/2 in wall-depth assumption. Change the actual construction method or timber dimensions and those lengths may change. Unit conversion alone does not substitute a UK timber section for a US one.
Studs, headers, rafters, hips, birdsmouth cuts, connections and support spacing need a confirmed framing design. The roof-framing figure is a length allowance, not a set of finished rafters. Keep unresolved rows on the quote worksheet until the design is settled. Our lumber buying guide explains the next step: turning confirmed cuts into stock lengths without losing the saw kerf or counting unusable offcuts twice.
Turn the PDF into a supplier quote you can compare
Organize your request by building section: base, floor, walls, roof and openings, followed by trims and accessories. Shed specialist Shedking’s materials-list approach also groups the takeoff by shed section before combining it for supplier pricing. That makes it easier to spot a missing item than one long, unlabelled list.
For each row, add the exact product or the specification still to be confirmed. “Roof sheets” leaves too much room for different quotes. A useful line identifies the material, thickness, rating, stock dimensions, quantity and whether delivery is included.
- Floor and framing: confirm actual sections, grade, treatment, lengths, supports and connection hardware with the design.
- Panels: specify intended use and product rating, then check orientation, supported joints and installation gaps. APA’s panel-spacing guidance explains why tightly butted wood panels can buckle as moisture changes. Follow the selected panel’s installation instructions.
- Cladding and roofing: ask for effective coverage, overlaps, compatible membranes, flashings, edge trims, fixings and finishing products.
- Openings: identify the actual door and window products, rough openings, hinges, locks, seals and thresholds.
- Costs around the materials: record delivery, unloading, tax, returns, hire and any separate base or installation work.
Keep kit comparisons separate from a loose-materials quote until you know what each includes. In DIY Huntress’s documented workshop-shed project, the foundation, kit assembly and roofing are distinct stages. It is a useful reminder to check the scope of a kit rather than assuming its headline price covers a finished, usable shed.
The planner’s on-screen materials range is illustrative. Replace it with dated local quotes before setting your budget. Compare the same specifications from each supplier, and note substitutions explicitly; a cheaper quote for different siding or thinner decking is not a like-for-like saving.
Five mistakes that make a shed order less useful
- Ordering roof covering from the footprint. Use the roof-surface result, then the chosen system’s coverage and detailing requirements. The 80 sq ft floor example has a 108.21 sq ft roof surface.
- Adding waste twice. The roof-finish quantity and rounded reference counts already include the selected allowance. Start with the net figure if you want to apply a different allowance yourself.
- Treating every offcut as reusable. Label its length, width, orientation and intended use. An offcut that cannot reach a support or match the board profile is not a saving.
- Buying doors after framing the opening. Obtain the chosen product’s rough-opening requirements first. The preview’s door and window sizes are model dimensions.
- Sending an outdated download. Use a dated project name and regenerate the PDF after the final change. Put the same reference on the supplier’s quote.
Shed materials planning FAQs
Is the planner and custom PDF really free?
Yes. You can change the design and download its materials PDF without payment, an email address or an account. Save the project file separately if you want to reopen the design; keeping a PDF does not preserve an editable project.
Can I build the shed using only this PDF?
No. It helps you estimate, compare and specify materials. It does not provide the final structural member sizes, roof cuts, connections, foundation or local approvals needed for construction. Use it alongside an appropriate confirmed design and the product instructions.
Why does timber cladding have a “sheets equivalent” result?
That row uses a common 4 x 8 ft reference area so quantities can be compared. It does not specify how timber siding is sold. Convert the net area plus the intended waste into boards or packs using the chosen profile’s effective coverage, and check the lengths needed around openings.
Should I always choose 10% waste?
No. It is the example setting. Repetitive cuts with reusable offcuts may need a different allowance from complex roof facets, awkward stock lengths or fragile finishes. Sketch the layout, check the product packaging and choose an allowance that fits that material. One general setting cannot resolve every product’s cutting pattern.
Can I use the list for a concrete slab instead of a timber floor?
The current floor rows describe a timber-floor assumption. Do not order those items automatically for a slab-based design. Have the base and wall connection details confirmed, remove superseded floor items from the quote worksheet, and calculate the slab separately from its actual dimensions.
Does changing the roof style update the materials?
Yes. The model and export follow the selected roof, including its surface geometry and relevant allowances. A hip or Dutch hip roof still requires its own framing and cut layout. A gable rafter schedule cannot be reused just because the footprint stayed the same.
Can I use metric measurements and UK materials?
You can enter metric dimensions and read metric quantities. The straight-blank schedule also shows millimeters. However, the reference sheets and stated framing assumptions remain part of the model; check actual local stock dimensions, specifications and product coverage before ordering.
What if the download does not start?
Wait for the PDF status message, then use Save this PDF if your browser does not start the download automatically. Keep the page open while it generates. Save the project file too, so you can reopen the design and try again without re-entering your choices.
Ready to compare your options? Open the free shed planner, save one realistic design and use its PDF to identify the products and details you still need to confirm. A clear, consistent quote request is the useful result to aim for.

