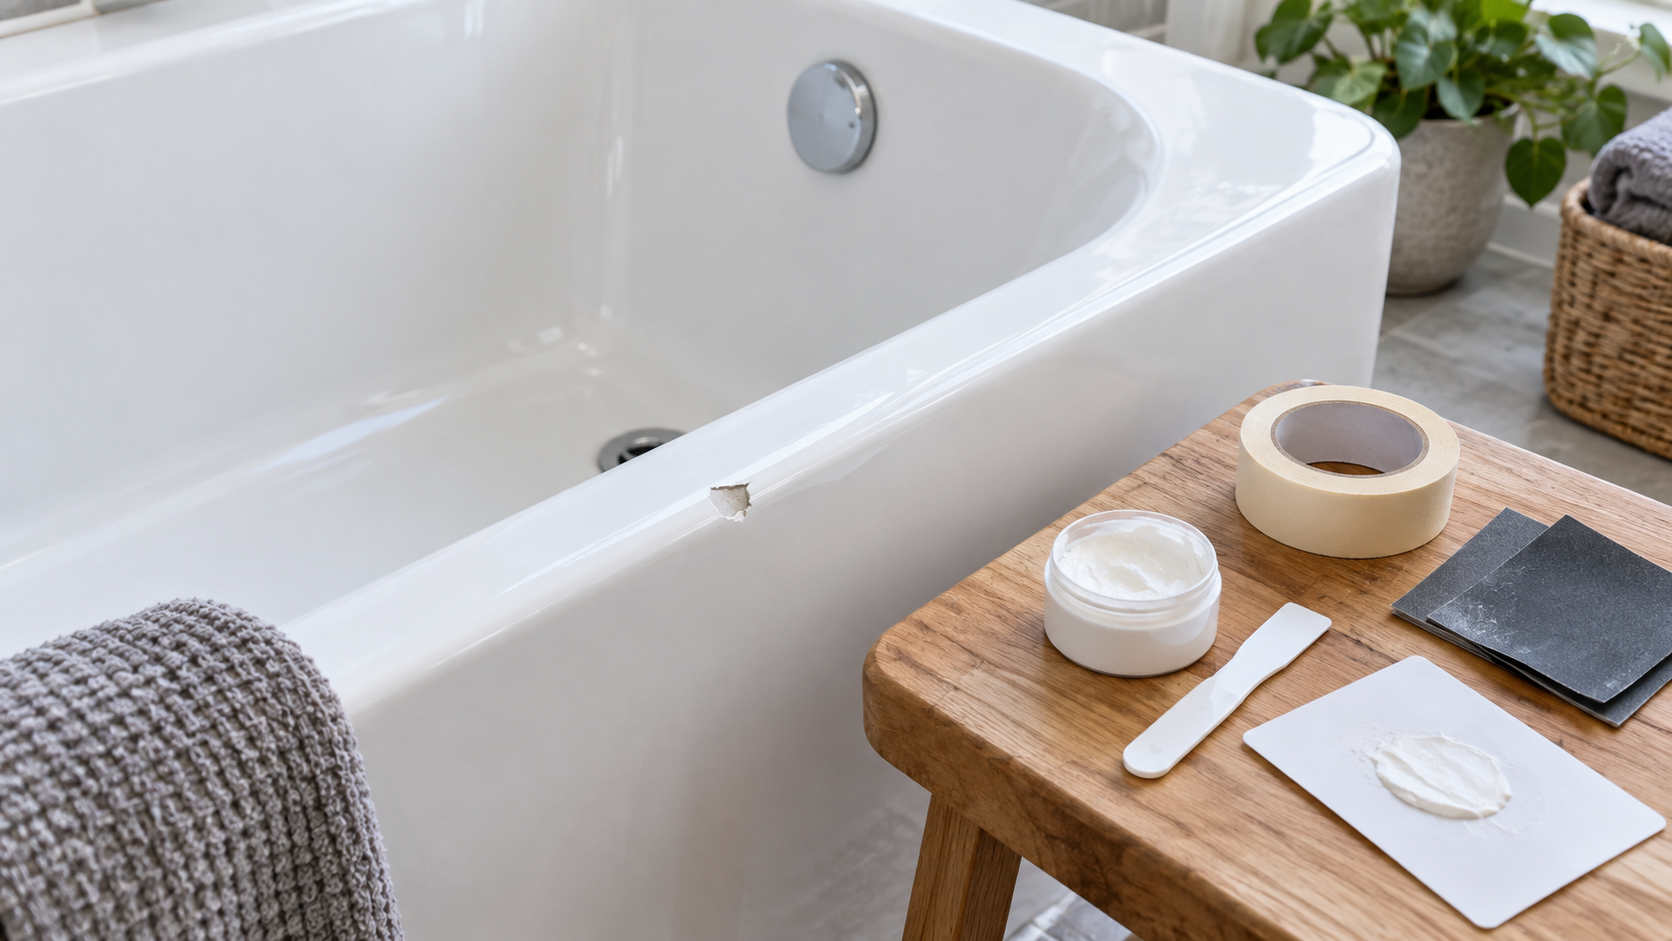
A chipped bath can make an otherwise clean bathroom look tired, but a small chip does not automatically mean the whole bath needs replacing. When the bath is firm, dry and structurally sound, a suitable cosmetic repair can improve the appearance and protect the exposed area from further wear.
Want to learn the complete cosmetic repair process?
Surface Defect Masters brings together practical demonstrations, equipment guidance and printable resources for working on baths, worktops, tiles, UPVC, doors and other decorative hard surfaces.
A massive discounted relaunch offer is now live.
First decide whether the chip is cosmetic
Before buying a repair kit, inspect the bath in good light and run your fingers around the damaged area. You are looking for a local loss of finish rather than movement or failure underneath it. A suitable cosmetic candidate is usually a small, dry chip with firm edges on a bath that does not flex when used.
Stop and investigate further if the bath moves, the damaged area is soft, water is getting behind the surface, or the mark continues as a long crack. Poor support, movement and structural failure can cause a cosmetic repair to break away. A cosmetic coating must never be presented as a fix for a leaking bath.
What bath material are you working on?
The surface affects the preparation and the repair product you need:
- Acrylic: common on modern baths and generally sensitive to aggressive solvents, heat and deep abrasion.
- Enamelled steel or cast iron: hard, glossy surfaces where a small chip may expose a darker layer or metal beneath.
- Porcelain or ceramic: more often found on basins and sanitaryware, with a hard glazed finish that needs careful edge preparation.
Do not assume that a white product is automatically compatible with every white bath. Follow the repair product manufacturer’s instructions and check that it is intended for the specific substrate and service conditions.
Tools and materials for a small cosmetic chip
For a modest repair, you may need:
- A suitable bathroom-surface repair compound or kit
- Clean degreaser recommended for the surface
- Fine wet-and-dry abrasive paper or the abrasive supplied with the kit
- Masking tape and lint-free cloths
- A small mixing card and applicator
- Suitable colourant or finishing coat if the kit requires it
- Gloves, eye protection and ventilation appropriate to the product
Keep the kit instructions beside you. Mixing ratios, working time, curing time and compatible topcoats vary between products, so a generic recipe is less reliable than the manufacturer’s own data sheet.
Use the product safety information before starting. UK readers can refer to the HSE COSHH guidance; US readers should check relevant OSHA construction safety guidance as well.
Step 1: Clean and inspect the damaged area
Remove soap film, polish, body oil and loose fragments. Clean a wider area than the chip itself so you can see its full outline. Allow the surface to dry completely. Moisture trapped under a filler or coating is a common reason for an otherwise neat cosmetic repair to lift.
Use a light from the side to reveal feathered edges and tiny loose sections. Do not enlarge the chip just to make it easier to fill. Remove only material that is genuinely loose or unstable.
Step 2: Protect the surrounding finish
Mask around the repair if it is close to a curved edge, tap hole or contrasting surface. The purpose is to keep filler, tint and abrasive marks within a controlled working area. On a glossy bath, even a small accidental sanding ring can be more noticeable than the original chip.
Step 3: Create a clean key
Follow the kit instructions for preparing the edges. Usually this means lightly abrading only the damaged area and removing the dust afterwards. The surface should be clean and suitably keyed, but you should avoid deep scratches across the surrounding gloss.
Do not use a power sander on a small sanitary-surface repair unless the product system specifically allows it and you understand how quickly it can remove material.
Step 4: Mix and apply the repair compound
Prepare the compound exactly as directed. Use the stated ratio and mix until the colour and consistency are uniform. Work within the product’s pot life rather than trying to rescue material that has started to cure.
Apply a small amount and press it into the chip. For a deeper defect, several controlled layers may be safer than one thick blob. Leave the repair slightly proud if the instructions allow it; that gives you material to shape after curing. Avoid spreading filler over a large area of intact bath surface.
Step 5: Allow the repair to cure
Cure time depends on the product, temperature, humidity and depth of the application. Do not sand, wash or put the bath back into service simply because the surface feels firm. Follow the stated cure time and keep the area protected from water and cleaning products while it develops its final properties.
Step 6: Shape and refine the surface
Once the compound is ready, smooth it gradually with the recommended abrasive. Keep checking by touch and by reflected light. The aim is to bring the repair level with the surrounding surface without cutting a wide dull patch into the bath.
Work through the grades recommended by the repair system. A finer finish may be needed before colour or topcoat is applied, especially on a glossy enamel or acrylic surface. Clean away residue between stages.
Step 7: Match colour and sheen
White baths are rarely one universal white. Compare the repair under the bathroom lighting where it will normally be seen, not only under a phone flash or workshop lamp. Apply thin layers and allow them to dry before deciding whether the colour needs another adjustment.
Colour is only part of the match. Gloss level, texture and the edge of the repair also affect how visible it is. A neat cosmetic result should blend naturally in normal use; no responsible guide can promise that every repair will be invisible from every angle.
Step 8: Inspect the finished result
Look from the side, stand back and check the surface when it is dry. Feel for a ridge, hollow or sharp edge. Check that the repair has not spread onto the drain, sealant line or other fitting. If the result is acceptable, follow the product instructions for returning the bath to use.
Common mistakes that make a bath chip repair worse
- Working over soap residue, polish or dampness.
- Using a filler that is not intended for the bath material.
- Mixing by eye when the product specifies a ratio.
- Applying one thick layer that shrinks or cures unevenly.
- Sanding a large halo around a small chip.
- Colour matching before the repair is properly shaped.
- Using the bath before the full cure time has passed.
- Calling a cosmetic finish structural or waterproof.
When replacement or professional assessment is safer
Do not use this process to hide a leak, movement, soft substrate or a crack caused by flexing. If water is escaping, identify and correct the underlying failure or replace the affected component. If the bath is poorly supported, fix the support problem before any cosmetic work is considered.
A large damaged area, repeated cracking, exposed metal, contamination or an uncertain substrate is a good reason to ask a qualified repair specialist or installer for an assessment. Cosmetic work can improve appearance, but it does not restore structural strength or guarantee permanent watertightness.
Frequently asked questions
Can I repair a small chip in an acrylic bath?
Often, yes, when the bath is stable, dry and not leaking. Use a product designed for acrylic and follow its preparation and cure instructions.
Can I repair an enamel bath chip myself?
A small local chip may be suitable for a cosmetic repair kit made for enamel or sanitary surfaces. The exposed layer, corrosion risk and position of the chip should be assessed first.
Can I use ordinary wall filler?
Ordinary wall filler is not automatically suitable for a wet, glossy sanitary surface. Use a compatible product intended for the substrate and service conditions.
Can I cosmetically repair a cracked bath?
Only after the cause has been assessed and the bath is confirmed to be properly supported. A crack caused by movement or structural failure can make a cosmetic repair fail.
Can a cosmetic repair fix a leaking bath?
No. A coating or filler should not be used as a solution for an active leak. Find and fix the failure or replace the affected item.
How long will a cosmetic repair last?
There is no universal lifespan. It depends on the substrate, preparation, product system, cure conditions, location and use. Follow the manufacturer’s maintenance guidance and inspect the area if it changes.
How can I learn to repair more than small bath chips?
The Surface Defect Masters course is designed around the wider cosmetic process, including preparation, filling, colour matching and finishing across baths, worktops, tiles, UPVC, doors and other decorative hard surfaces.
Final thoughts
A chipped bath is a good example of why cosmetic repair starts with assessment rather than filler. If the item is sound, the defect is local and the product matches the substrate, careful preparation and controlled finishing can make a worthwhile visual improvement. If there is movement, water ingress or structural uncertainty, stop and deal with that problem first.
For more guidance, read our beginner’s guide to hard surface repair and browse the Handyman Hub project guides.