How to Repair a Chipped Granite or Quartz Worktop: A Safe Cosmetic Guide

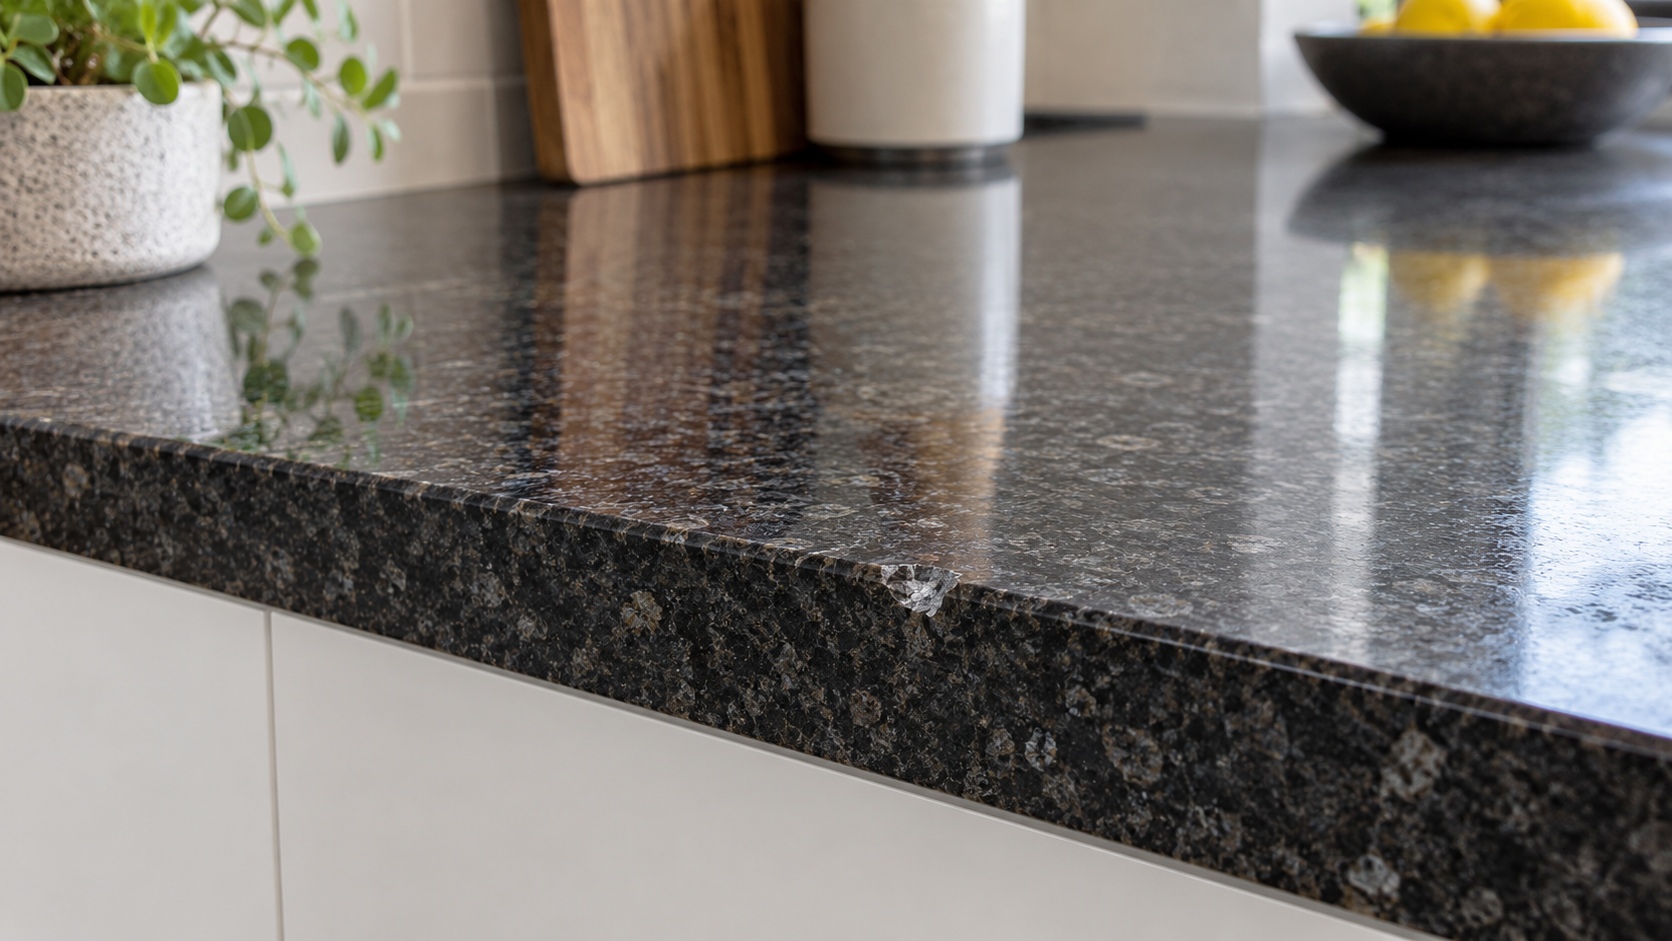
A small chip in a granite or quartz worktop can catch your eye every time you walk past it. Before reaching for a filler, identify what has actually happened. A local edge chip in a dry, well-supported surface may be suitable for a cosmetic repair. A crack running from a sink or hob cut-out, movement in the slab or water getting into the cabinets needs proper assessment first.
Want the complete cosmetic repair process?
Surface Defect Masters demonstrates preparation, filling, colour matching and finishing across worktops, baths, tiles, UPVC, doors, sinks and other decorative hard surfaces.
A massive discounted relaunch offer is now live.
Granite and quartz are not the same material
Granite is natural stone with visible variation, crystals and veins. Quartz worktops are engineered slabs made from stone aggregate and resin, so the colour and pattern may run through the material but the resin content changes how it reacts to heat, abrasives and repair products. Some people also use “quartz” loosely for other engineered stone products. Check the supplier or fabricator paperwork before choosing a kit.
That identification step matters because a resin that bonds well to one surface may cure with the wrong sheen or colour on another. Never assume a general-purpose glue, car body filler or bathroom sealant is a suitable worktop repair.
When a chip is suitable for cosmetic work
A good candidate is small, local, dry and stable. The surrounding edge should feel solid when pressed gently, with no movement, swelling or separation. The chip should not continue into a crack or sit across a joint. Take a clear photograph and inspect it in side light so you can see whether loose fragments are still attached.
Pause and arrange an assessment if you see a crack radiating from a cut-out, a slab that rocks, a joint that has opened, staining underneath, repeated chips in the same area or damage caused by a structural impact. A tidy-looking patch cannot correct poor support or a failed installation.
What you need for a small stone chip
- A repair system specifically stated as suitable for granite, quartz or the exact engineered surface
- Manufacturer-approved cleaner and lint-free cloths
- Low-tack masking tape to protect the surrounding polish
- A mixing card, small spatula or precision applicator
- Compatible colour tints or stone powders where the system requires them
- Fine finishing abrasives or polishing pads supplied with the system
- Gloves, eye protection and ventilation suitable for the product
Read the technical data sheet before you start. Note the mix ratio, pot life, minimum temperature, cure time and whether the product is intended for a food-contact area. UK readers can refer to HSE COSHH guidance; readers in the United States can check OSHA construction safety guidance.
Step-by-step: a small edge chip
1. Clean and dry the area
Remove grease, polish, crumbs and loose grit from the chip and the surrounding edge. Use only a cleaner compatible with the surface. Allow it to dry fully; trapped moisture can spoil adhesion and cloud the finish.
2. Protect the polished surface
Apply low-tack tape around the defect, leaving the chip itself open. Keep the tape neat and close to the edge so the repair does not spread onto a wide area of polished stone. Do not use aggressive tape that could lift a surface coating.
3. Remove only unstable fragments
Brush away loose particles and follow the kit instructions for preparing the cavity. The goal is a clean, stable repair area. Do not grind a small chip into a large crater simply to make it easier to fill.
4. Mix and tint carefully
Measure the components accurately. If tint is required, add it gradually and compare the colour under the kitchen lighting where the repair will be seen. Stone often contains several tones, so a slightly imperfect colour that is kept local can look better than an overworked patch.
5. Fill slightly proud
Use the applicator to press the repair compound into the cavity and remove air pockets. Leave only the small amount of excess allowed by the instructions. Keep the material off the surrounding polish.
6. Allow a full cure
Protect the area from water, heat and cleaning products for the stated cure time. A surface that feels firm may still be chemically curing underneath. Rushing to sand can pull the repair out.
7. Level and blend
Shape the cured repair with the recommended abrasive, working in small controlled movements. Check by touch and reflected light. Stop as soon as the surface is level. On a polished quartz or granite edge, excessive abrasion can create a dull halo that is harder to disguise than the original chip.
8. Clean and inspect
Remove the tape, clean away dust and inspect the repair from normal standing distance as well as close up. A good cosmetic result should be neat and stable; it does not need to promise an invisible or structural restoration.
Common mistakes with granite and quartz repairs
- Using an untested adhesive because the chip looks small.
- Applying product over dampness, grease or stone dust.
- Mixing by eye instead of following the ratio.
- Choosing colour under a different light from the kitchen.
- Grinding a wide area around a tiny edge defect.
- Placing a hot pan over a repair before the product is fully cured.
- Calling a cosmetic patch a waterproofing or structural repair.
- Ignoring a crack that is moving or spreading.
Heat, sink edges and food-preparation areas
Quartz and other engineered surfaces can be sensitive to concentrated heat. Follow the fabricator’s care instructions and use trivets. Around sinks, check whether the real problem is a failed seal or water entering the cabinet. A cosmetic edge repair should not be used to hide an active leak.
If the worktop is used for food preparation, choose a product whose documentation addresses that use and follow its cleaning and cure requirements. Do not improvise with materials that have no relevant technical information.
When replacement or a specialist is the better choice
Contact a stone fabricator or repair specialist when the chip is large, sits across a seam, continues as a crack, reaches a cut-out, affects the support edge or has been caused by a heavy impact. Specialist equipment may be needed to match a high polish, vein or edge profile. Replacement may be more sensible when the slab has lost support or the damage is widespread.
Frequently asked questions
Can I repair a small chip in granite?
Often, yes, when the chip is local and the slab is stable. Use a system designed for granite and expect the repair to remain slightly visible under close inspection.
Can I use epoxy on quartz?
Only if the product documentation confirms compatibility with the exact surface. “Epoxy” describes a broad family of products; cure, colour and polish behaviour vary.
Will a repaired chip be waterproof?
A compatible repair may close a local cosmetic cavity, but it should not be relied on to seal a failed joint, leaking sink or cracked slab.
Why does the repair look dull?
The filler, abrasive or polishing process may not match the surrounding sheen. Over-sanding can create a larger dull area. Follow the repair system’s finishing instructions.
Can I repair a crack from a sink cut-out?
Do not treat that as a simple chip. A crack from a cut-out can relate to support, movement or installation stress and should be assessed before cosmetic work.
Where can I learn the wider process?
The Surface Defect Masters course covers cosmetic repairs across worktops, baths, tiles, UPVC, doors, sinks and other decorative hard surfaces.
Final thoughts
The safest stone repair starts with restraint. Identify the material, confirm the defect is local and stable, use a compatible system and protect the polished surface. If the worktop moves, leaks or has a spreading crack, solve that underlying problem before thinking about appearance.
For a related guide, read our kitchen worktop repair guide, then browse the Handyman Hub project guides.