

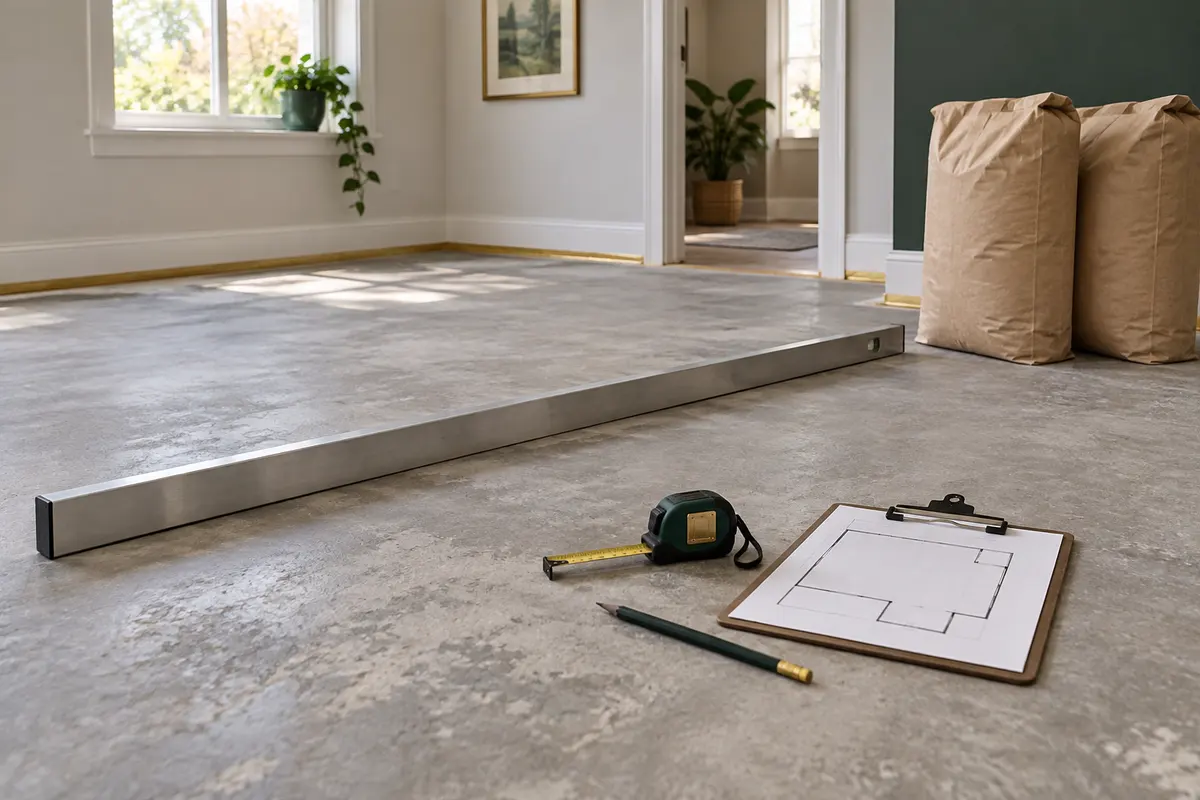
A room measuring 120 square feet can need five bags of floor leveler—or six—without its footprint changing at all. The difference can be as small as a deeper section along one side. That is why a bag count based on room area alone is a shaky starting point.
Calculate each zone’s area and required average thickness, apply the chosen product’s coverage, add a deliberate allowance, then round the combined requirement up to whole bags. Subtract any usable matching stock only after that rounding. The free self-leveling compound calculator handles those steps and shows the working.
This guide walks through the actual fields, with two examples checked against the live calculator. It estimates quantities; deciding which product and floor system are suitable comes first.
Start with the floor you need to achieve
Sketch the room before opening the calculator. Mark its dimensions, the proposed finished surface and the places that need a different thickness. A room can be flat but slope, or broadly level while still having local hollows. Those are different problems, and the amount of material depends on the correction actually specified.
Use measured thicknesses relative to the intended surface, not a guess from the single worst dip. For example, a half-inch hollow occupying a small patch does not mean the entire room needs half an inch. Equally, using the thinnest spot for everything ignores the extra material elsewhere. Record enough representative zones to describe the floor sensibly.
A practical sketch might say “main area: 8 × 10 ft, average ¼ in” and “side area: 4 × 10 ft, average ½ in.” Those rectangles must not overlap. Include an alcove that will receive compound; leave out an area only when the specification really excludes it. Keep the drawing so someone else can understand what your figures represent.
The depth you enter is the thickness of the compound layer, not the total thickness of the floor assembly. It does not include the subfloor, underlayment board or new finish. If you are estimating a separate screed layer, use the floor screed volume and bag-yield guide for that part of the job.
When averaging two depths works—and when it does not
For a rectangular zone that changes evenly from one depth at an edge to another depth at the opposite edge, the average is the two depths added together and divided by two. That is the calculator’s Linear taper — rectangle only option. A scattered collection of hollows is not a linear taper. Averaging its highest and lowest readings alone gives no information about how much floor lies at either depth; use representative measured zones instead.
How to use the self-leveling calculator
1. Choose units before entering the product data
Under Measurement system, choose Imperial — decimal ft, ft², in, lb, US gallons for the examples here. Room lengths use decimal feet, while depth uses inches. Twelve feet six inches is 12.5 feet; 12.6 feet is a different measurement. A quarter-inch depth is 0.25, not ¼ typed into a number field.
Changing units converts the existing measurements. It does not pick an American product or replace the starting coverage with a suitable local bag. Check the coverage and reference depth again after switching. Currency — display only changes the money label, not exchange rates. Select USD if entering dollar prices.
2. Enter areas, then deal with exceptions
Set Default applied depth (in). In an area card, select Rectangle / room and enter Length (ft) and Width (ft). Use Direct measured area if you already have a reliable square-foot total. Do not also enter the same floor as a rectangle.
Use + Add another area for a separate room or depth zone. Open its Depth settings when its thickness differs from the default. Leave the override blank only when that zone should use the default. Name zones after your sketch so the result table is easy to check.
Number of identical copies repeats the area and its per-copy deduction. It is useful for truly identical spaces, not several slightly different rooms. Check deductions carefully: a deduction should remove floor that will not receive material, not serve as an improvised waste adjustment.
3. Match the coverage to the bag you will buy
Choose Coverage per bag / complete kit under Manufacturer quantity method. Enter both Coverage per bag/kit (ft²) and At reference depth (in). “30 square feet” means little without its corresponding depth. The alternative powder-consumption method is for a data sheet expressed as powder use per area and depth; do not substitute a guessed wet density.
For a real reference, ARDEX lists K 15 coverage at 30 square feet per 55 lb bag at ¼ inch. We use those coverage figures below to make the arithmetic concrete. That is not a product recommendation for your substrate, and the $40 bag price and 10% allowance are hypothetical planning inputs.
For a two-part product, ensure the coverage and price refer to one complete kit. Enter the matching powder bag weight if you want the powder-weight result. A supplied liquid component is not another interchangeable bag.
4. Set allowance, stock and any prices
Enter Compound waste / extra (%) deliberately. It is not a correction for an unmeasured floor. Under Usable whole bags / complete kits already on site, count only complete, usable stock of the same product. Then add Price per new bag / complete kit, or leave it at zero for quantities only.
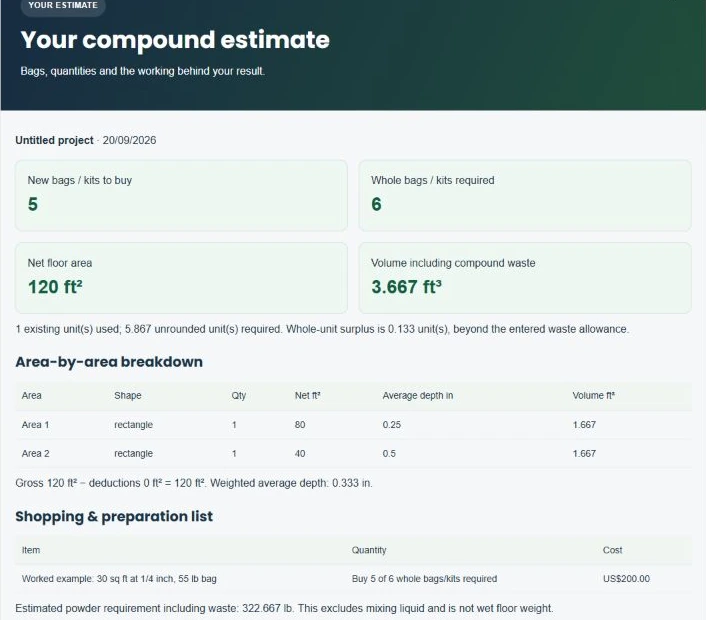
Click Calculate compound requirements. After any input change, click it again: the previous estimate is no longer current. Compare the area-by-area breakdown with your sketch before trusting the shopping list.
Two checked examples: the same area, different bag counts
Both examples use the coverage above, 10% extra and one usable bag already on site. Labour, primer, equipment, tax and markup are excluded. The arithmetic and displayed purchase counts were checked on the live tool on September 20, 2026.
| Input or result | Example 1: uniform floor | Example 2: two depths |
|---|---|---|
| Area entries | 12 × 10 ft | 8 × 10 ft + 4 × 10 ft |
| Applied depth | 0.25 in throughout | 0.25 in and 0.50 in |
| Total area | 120 ft² | 120 ft² |
| Unrounded bags, including extra | 4.4 | 5.8667 |
| Whole bags required | 5 | 6 |
| New bags after one in stock | 4 | 5 |
| New purchases at $40 each | $160 | $200 |
Example 1: a 12 × 10 ft floor at ¼ inch
The area is 120 ft². Divide by 30 ft² per bag: that gives four bags before extra. The applied and reference depths are the same, so no thickness adjustment is needed. Four multiplied by 1.10 is 4.4 bags. Round up to five whole bags, then subtract the one usable bag in stock: buy four new bags.
The volume check is 120 × (0.25 ÷ 12) = 2.5 cubic feet before extra, or 2.75 cubic feet with it. Dividing inches by 12 is essential when multiplying by an area in square feet. This volume is a useful cross-check, not a substitute for the product’s bag coverage.
Example 2: a deeper 4 × 10 ft strip
Change the first rectangle to 8 × 10 ft at 0.25 inch. Add a second rectangle measuring 4 × 10 ft and set its depth override to 0.50 inch. The first zone needs 80 ÷ 30 = 2.6667 bags. The second needs (40 ÷ 30) × (0.50 ÷ 0.25) = 2.6667 bags.
Together, that is 5.3333 bags before extra and 5.8667 after multiplying by 1.10. Round the combined figure up once to six. With one in stock, buy five. Notice that the smaller zone consumes as much as the larger one because it is twice as deep.
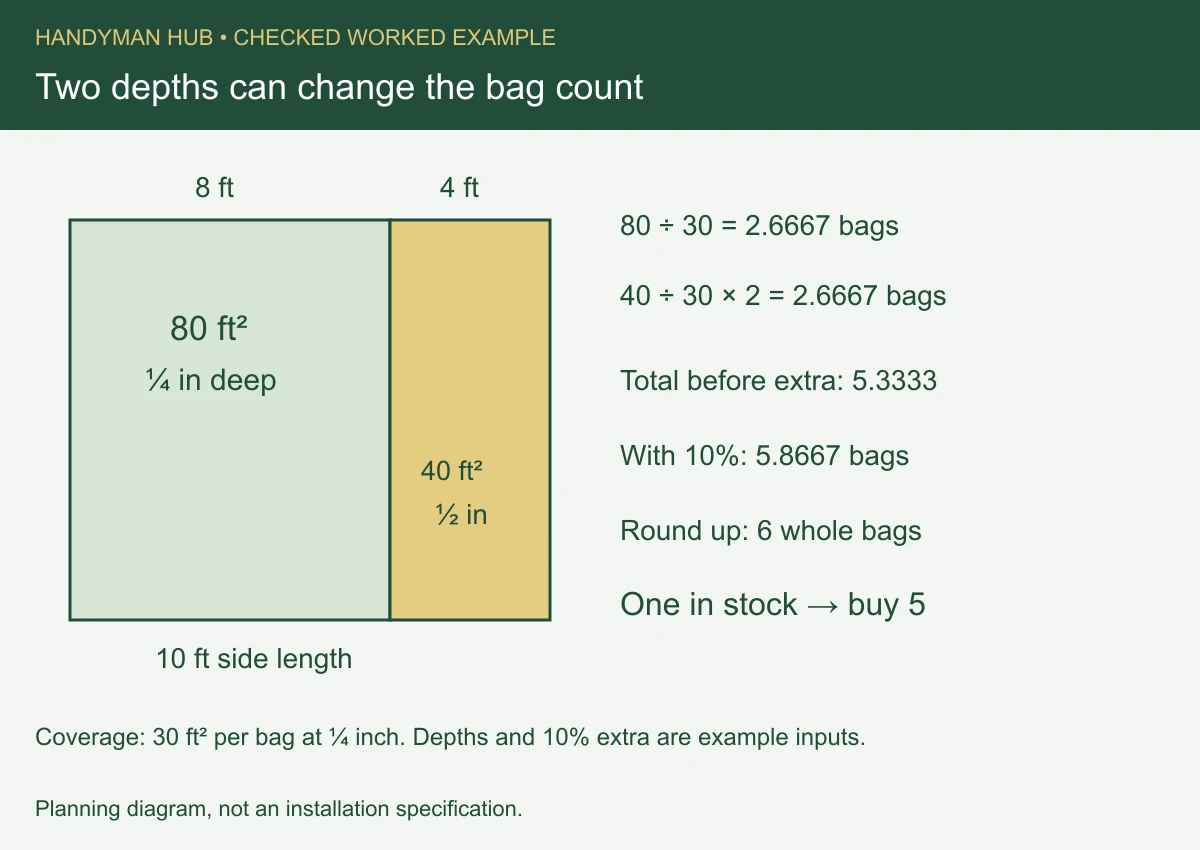
The weighted average is about 0.333 inch, not the simple midpoint of 0.25 and 0.50. The two depths cover unequal areas. Entering them separately avoids having to calculate that weighted average yourself.
Keep primer, mixing liquid and installation decisions separate
Tick Estimate primer quantities and cost only after obtaining the matching primer specification. Its coverage, coat count and pack size have their own effect on the order. Compound waste does not automatically describe primer waste. DIYTileGuy’s practical underlayment guide explains why primer choice, dilution and preparation need attention; use the exact manufacturer instructions for your system.
The optional mixing-liquid total helps plan supplies for whole units. It is not permission to add extra water or alter a supplied liquid component. The displayed powder weight excludes liquid and is not the installed wet load. Do not use it to assess the floor structure.
For costing, the stock bag has no purchase cost assigned in this estimate. If you need to recover its historic cost on a customer job, account for that explicitly. Closing an optional price section retains entered values; clear unwanted entries or choose no labour rather than merely collapsing the section.
Why a result may look wrong
- The estimate seems far too high: check inches against millimeters, look for duplicate areas, and confirm you have not applied the deepest hollow to the whole room.
- The new bag count is unexpectedly low: check existing stock and depth overrides. A stock entry reduces purchases, not the total requirement.
- A small edit adds a whole bag: that can be correct. Crossing from 5.99 to 6.01 unrounded units changes the whole requirement from six to seven.
- The figure did not update: press the calculation button again and read any validation message. Do not order from an earlier displayed result.
- The cost looks complete but is too cheap: only entered costs count. A materials subtotal does not include preparation, delivery, primer or labour unless you include them.
Self-leveling compound FAQs
How many bags do I need for 100 square feet?
There is no reliable area-only answer. You also need applied depth, bag coverage at a stated depth, an allowance and any usable stock. With our example coverage at the same reference thickness, 100 ÷ 30 × 1.10 is about 3.667 bags: four whole bags before subtracting stock.
Can I use the average of the deepest and shallowest spots?
Only when that average correctly describes the geometry, such as an even linear taper across a rectangle. It does not describe irregular dips. Measure representative zones and enter their own average depths.
Should I round each room up separately?
The calculator pools one product across the project and rounds once. Separate deliveries or different product systems may need separate estimates. Do not add rounded room counts to a pooled count; that would duplicate the allowance created by rounding.
Does 10% extra suit every floor?
No. It is an example, not a universal recommendation. Base the allowance on measured uncertainty, handling and the installation plan. Improve poor measurements before relying on a larger percentage to cover them.
Can an unopened leftover bag reduce my order?
Only if it is the same product and remains usable under its storage and shelf-life requirements. Enter complete usable units. A damaged, expired or incomplete kit should not be treated as dependable stock.
Can the calculator tell me when I can lay flooring?
No. Product guidance distinguishes application, walking and receiving a floor covering; those milestones are not interchangeable. Follow the current instructions for the actual conditions and covering rather than deriving a drying time from the bag count.
Will it calculate a sloping or unusually shaped room?
It supports rectangles, triangles, circles and direct measured areas. Use separate zones where depths differ. Shape calculations do not decide the required surface elevation or product suitability.
Can I save the calculation and continue planning the finish?
Use Print / Save PDF after calculating and keep the sketch with it. For the next stage, follow our flooring-pack guide, or use the tile, grout and adhesive calculator for a tiled finish.
Open the free self-leveling compound calculator →
Keep your area sketch and the product coverage sheet beside you while entering the figures.
Featured image: original concept illustration, not a completed Handyman Hub customer project.




[…] Self-Leveling Compound Bags […]